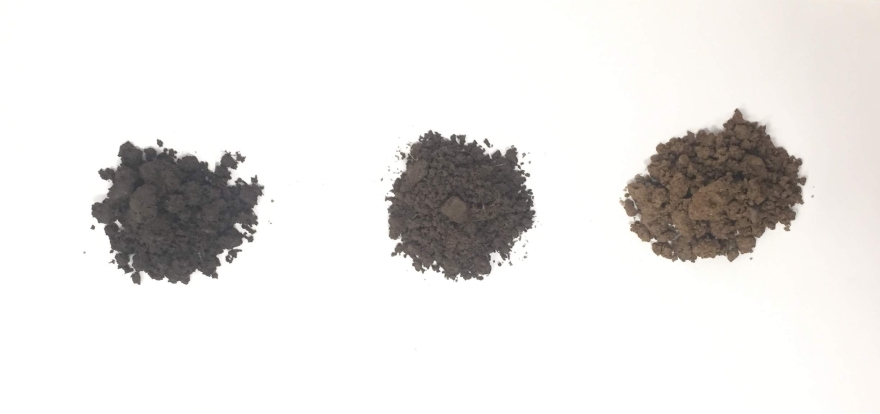
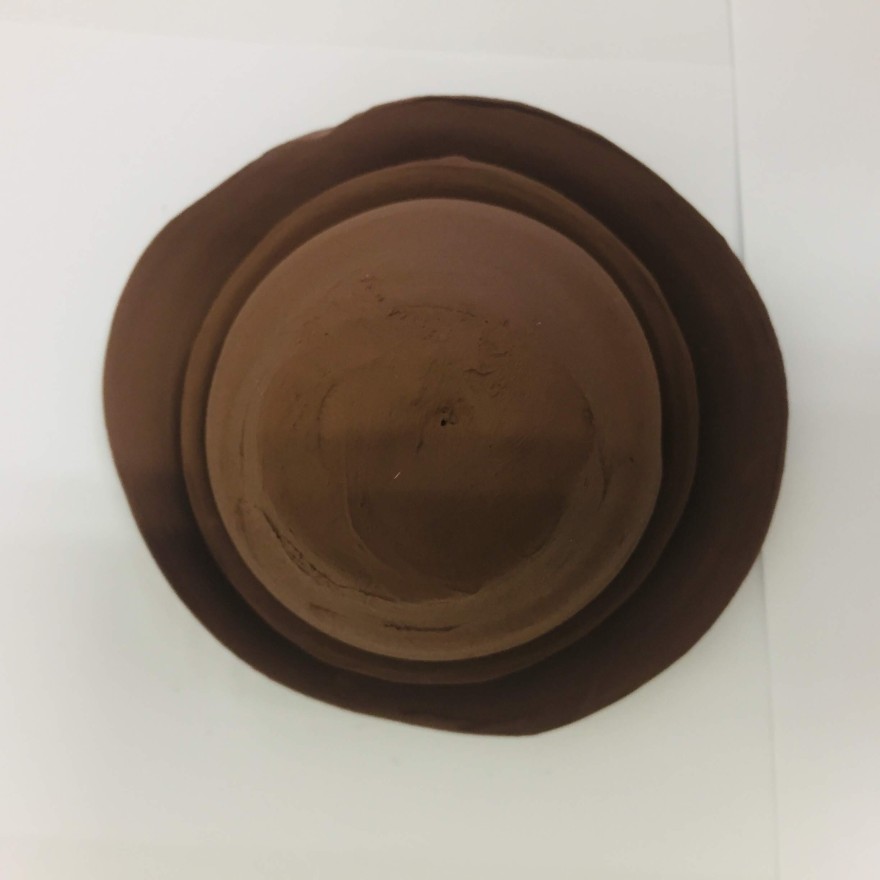
Before I arrived in Cardiff, I had dug three separate samples of soil from the different fields on the farm. My thinking at the time was to use the clay, part of the landscape of home and of my memory in creating work.
Above are images I took of the clay samples in order to show the difference in colour between the three soils. One, the redder clay sample, seems to be heavy with iron. I had mentioned my intention in passing one lunch time to Bernadette Tuite, a past applied art graduate of Crawford. Very generously, she showed me the testing she had done in processing her own clay collected from different beaches and the resulting slip and glazes she had made. I loved the variety in tones and shades she had on display from different firing temps. This was the encouragement I needed to try my own testing.
So why am I writing any of this? Well my Erasmus trip got the go-ahead and plans for semester 2 in Crawford go put on hold. Until now……I found out that level 4 ceramic students at CSAD do the homemade clay process as part of module. I saw the samples that students made, how they fired them at different temperatures and thought maybe I don’t need to put my plans on hold. I can learn the process, become familiar with the steps so that when I return home I can start work on testing clay from the farm. Besides this, I also want to try using other materials from the farm; lime from whitewash, ground down slates from the farmhouses, quartz from stones used in ditches, wood-ash made from different trees from around the landscape and, maybe, bones that I’ve found whilst out walking the dog.
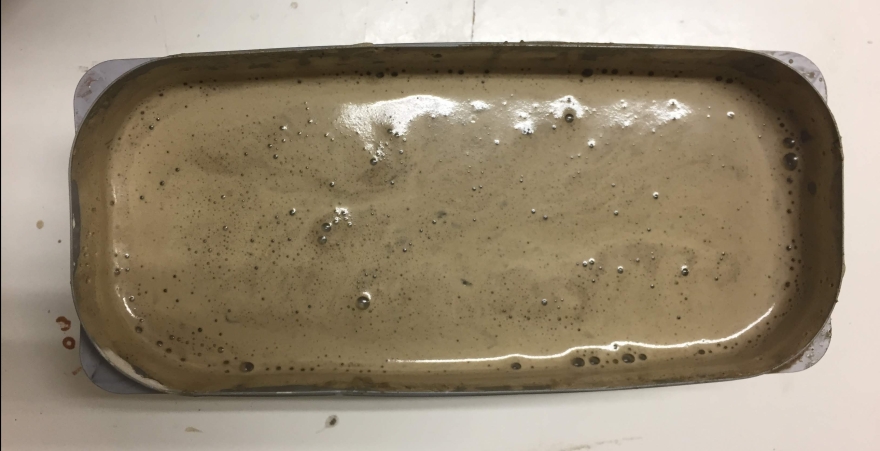
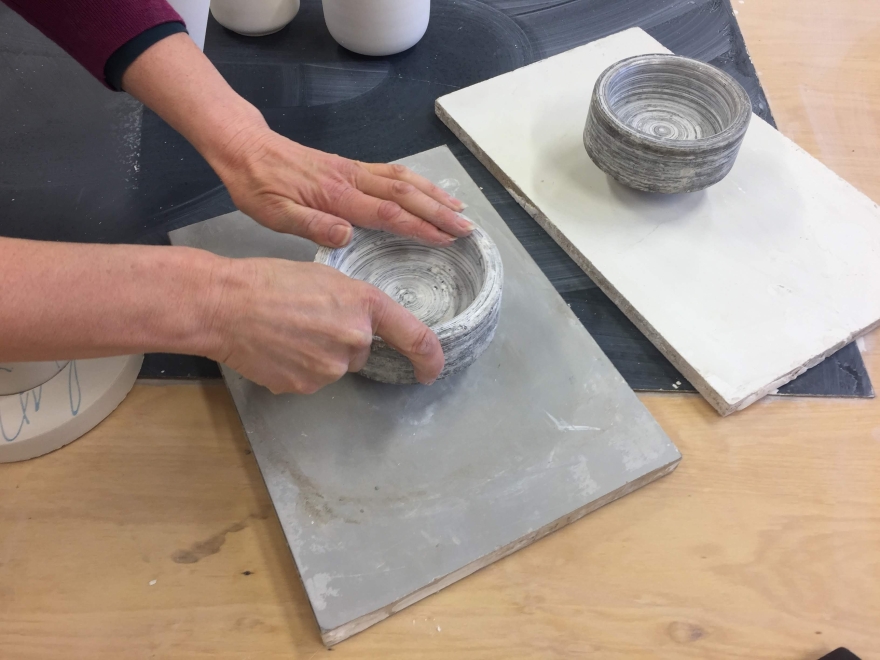
A student from level 5 gave me clay she had dug from her home village in the Valleys. It was dry so I had to break it up, pour water into the tub and allow it to sit overnight. This would allow the organic matter like twigs to come to the top of the water. I noticed how different the colour of this clay is compared to the clay samples I dug at home in Ireland.
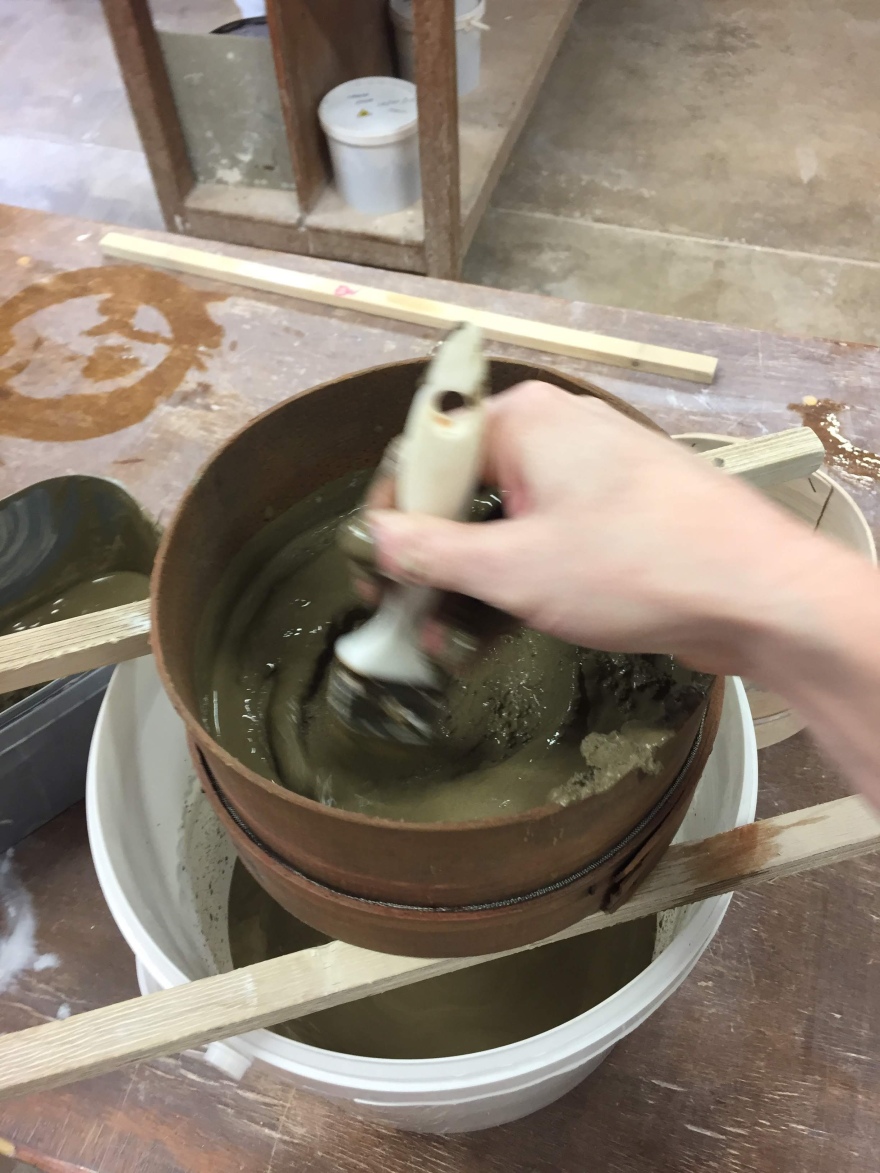
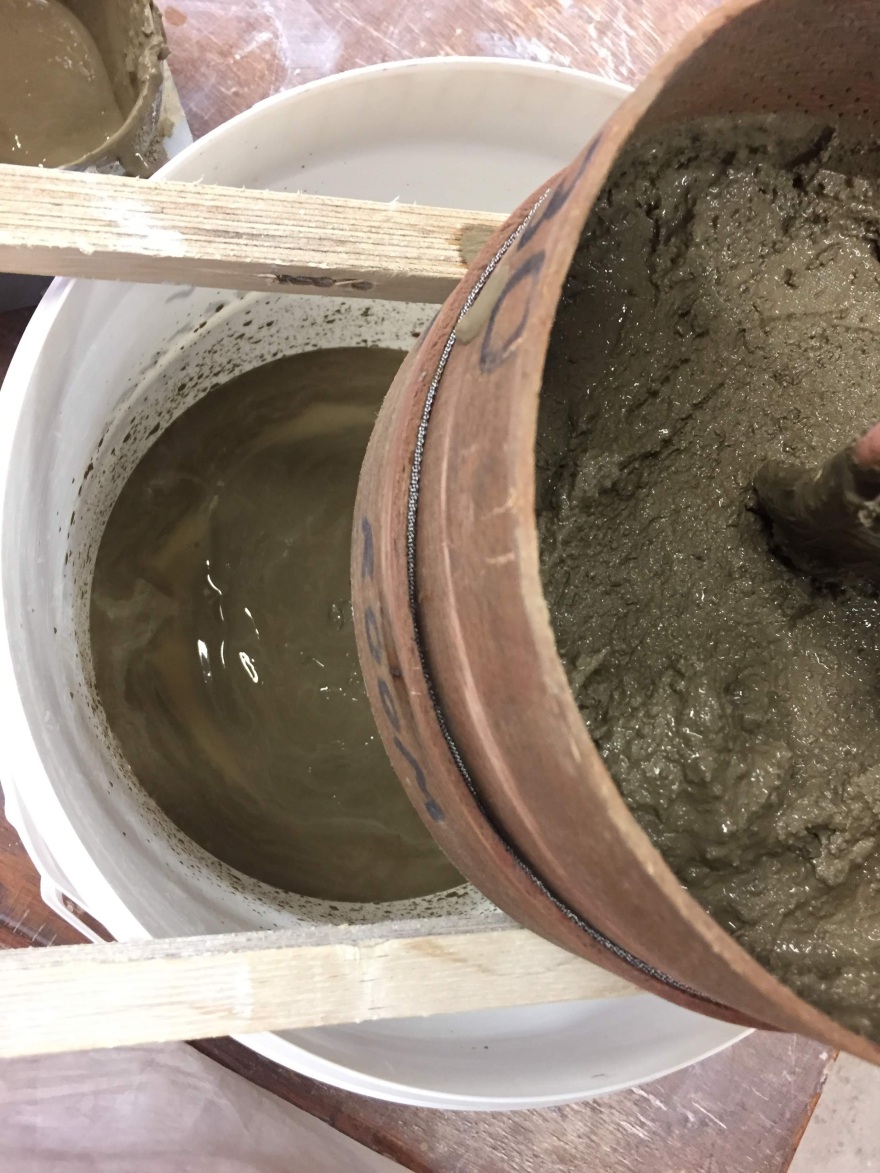
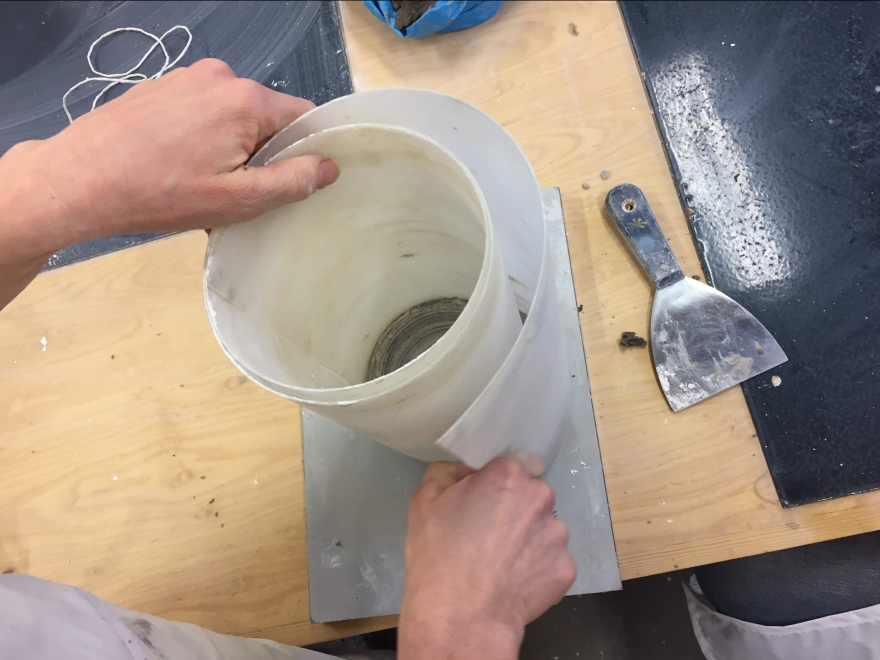
Bubbles and other matter coming to the top of my water and clay mixWater poured off, now for sievingFirst sieve: grade 30 sievePushing clay through sieve with an old paintbrushDifference in texture between before and after sieving. The clay slip in the white bucket is silky, has no granule texture to it.Second sieve: 60 grade sieve to make clay/water mix even finer.
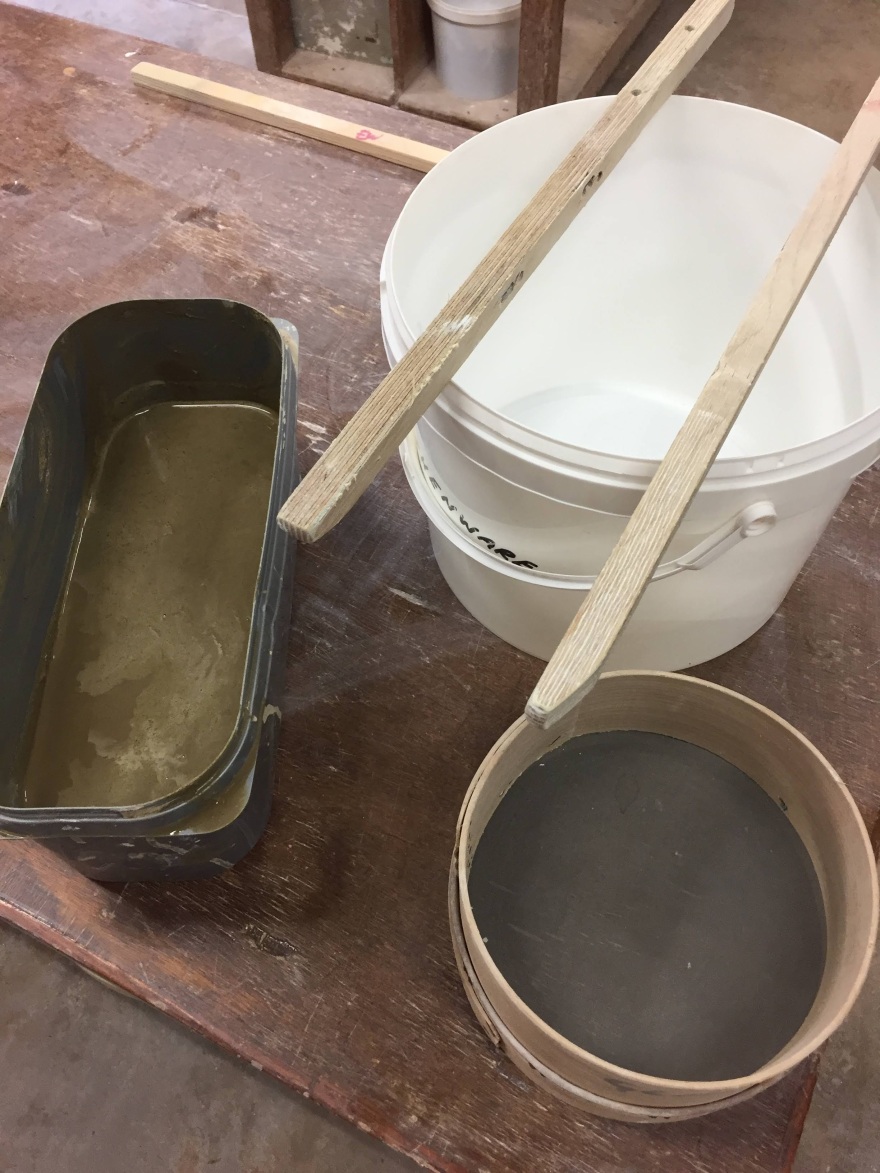
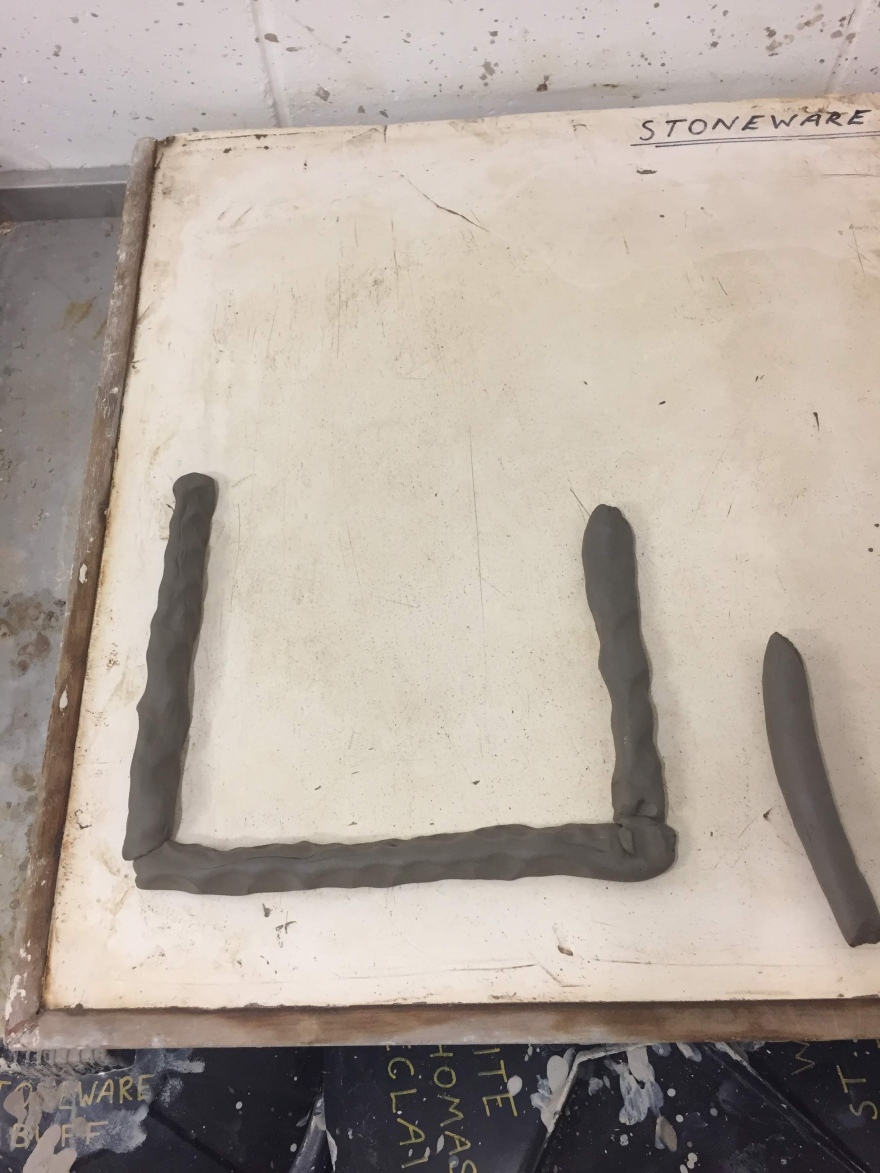
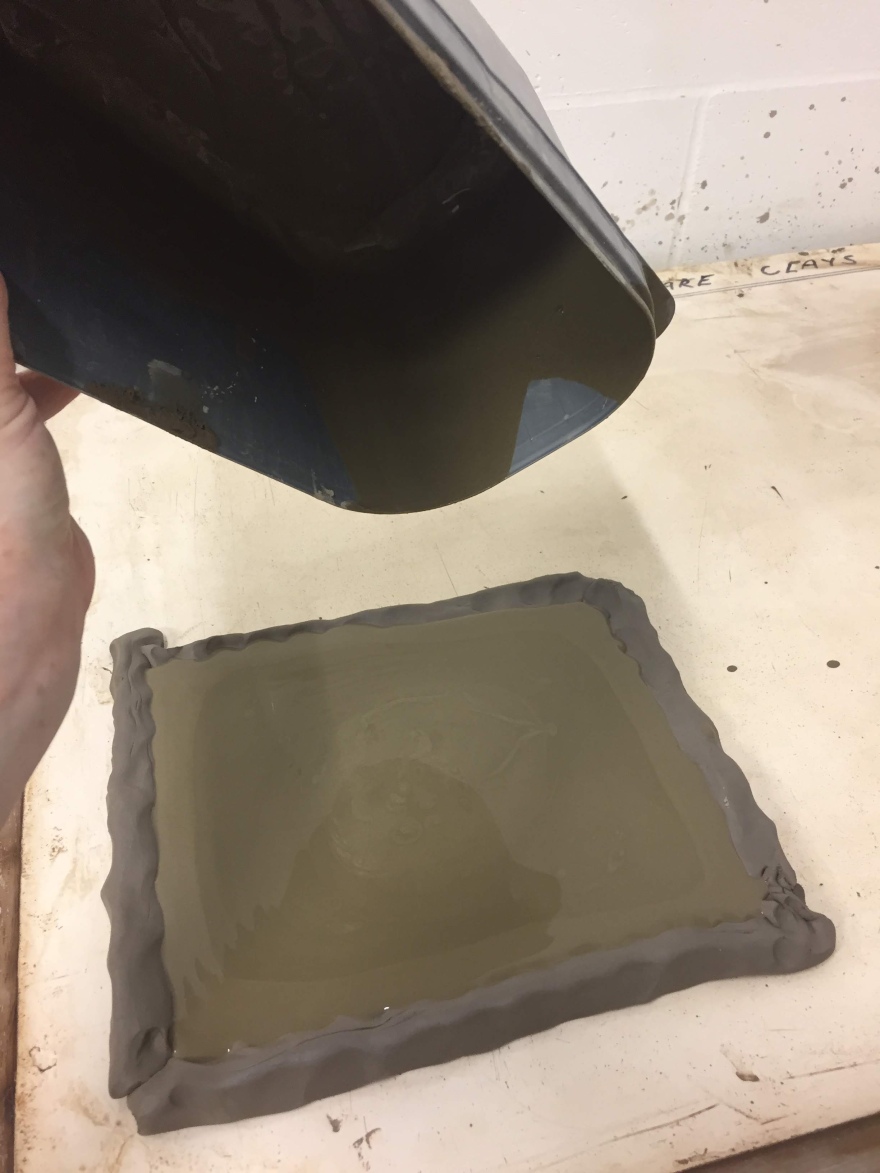
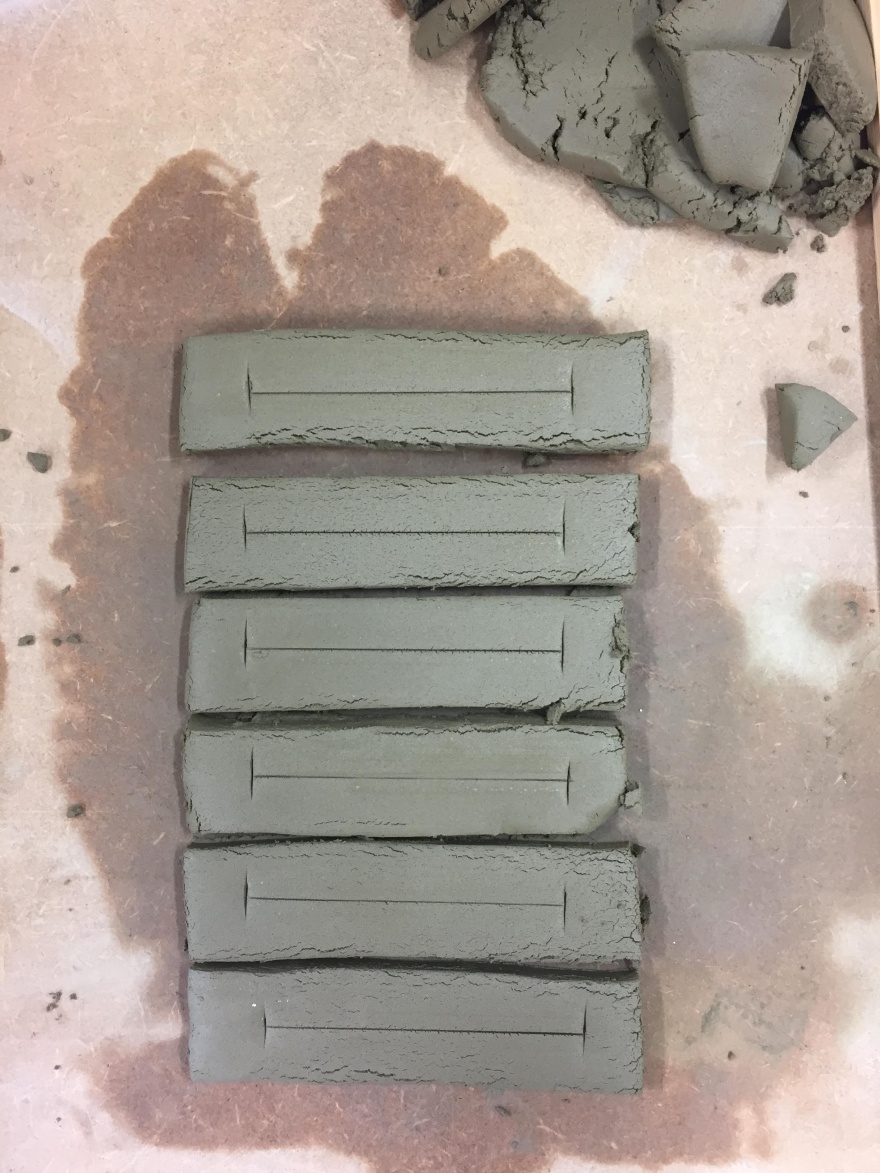
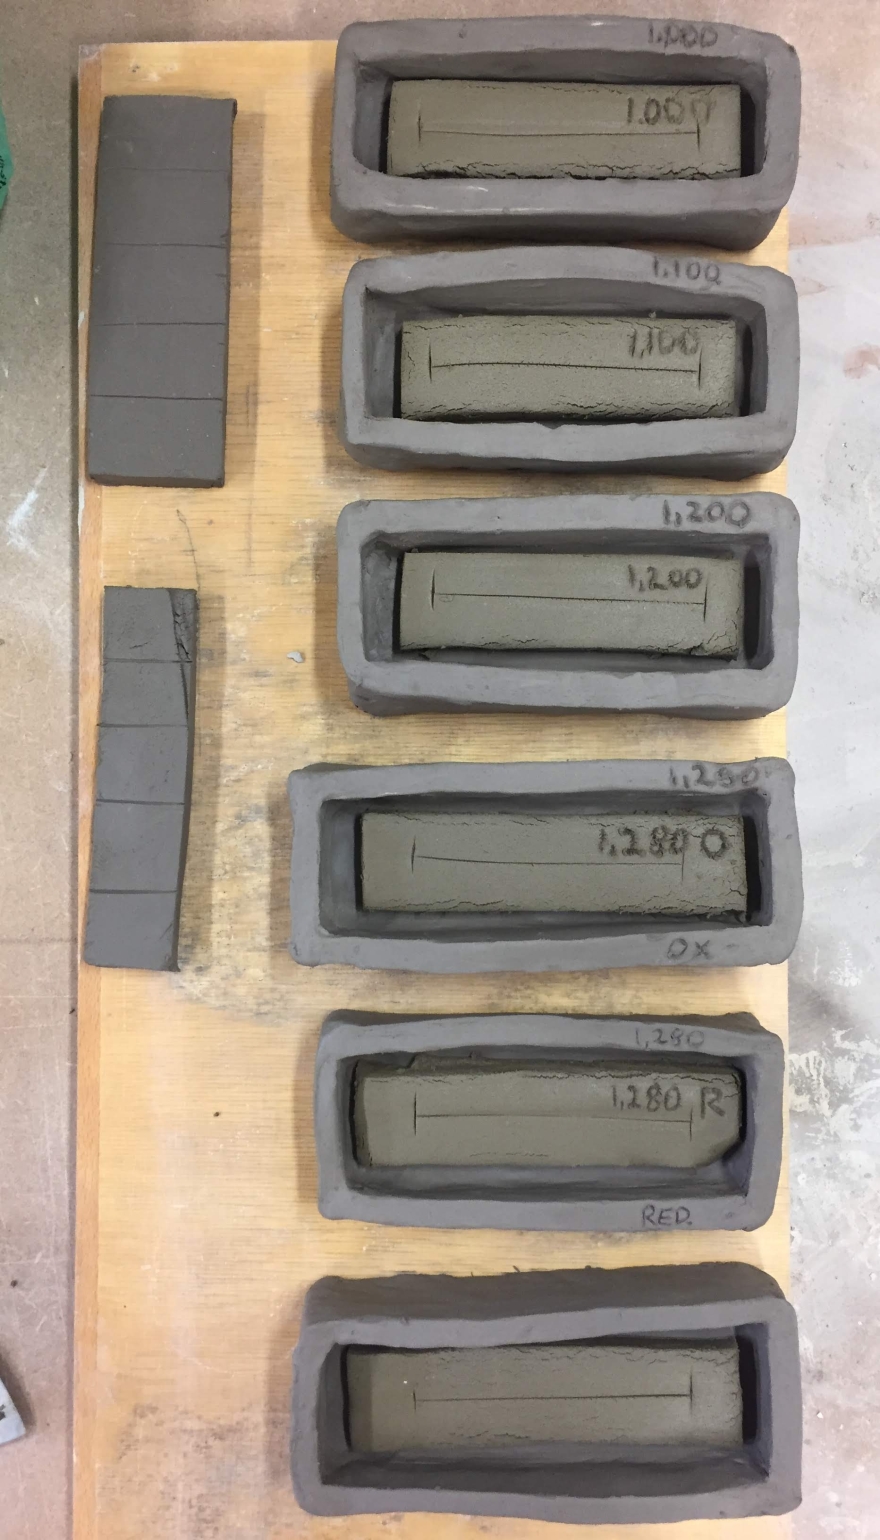
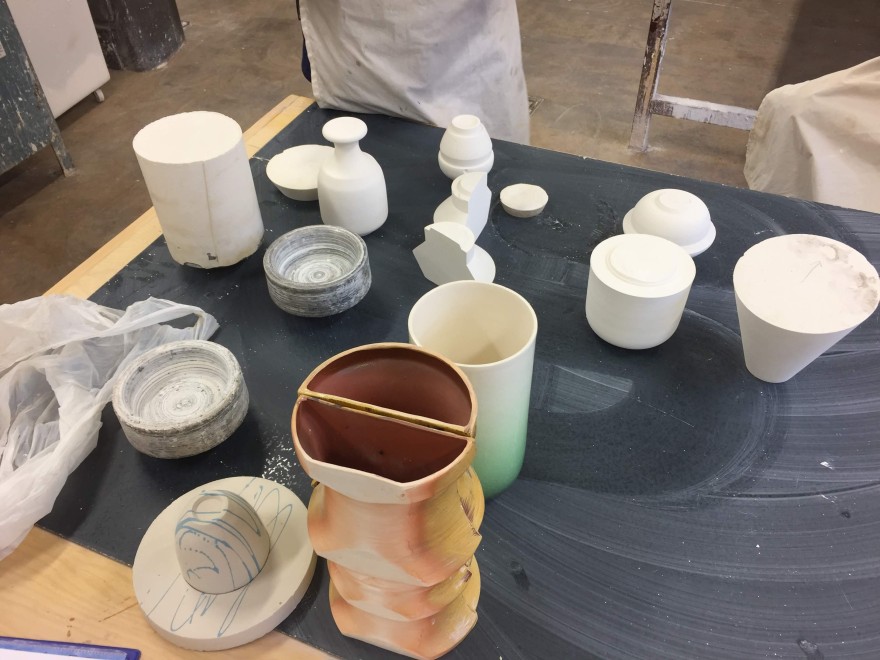
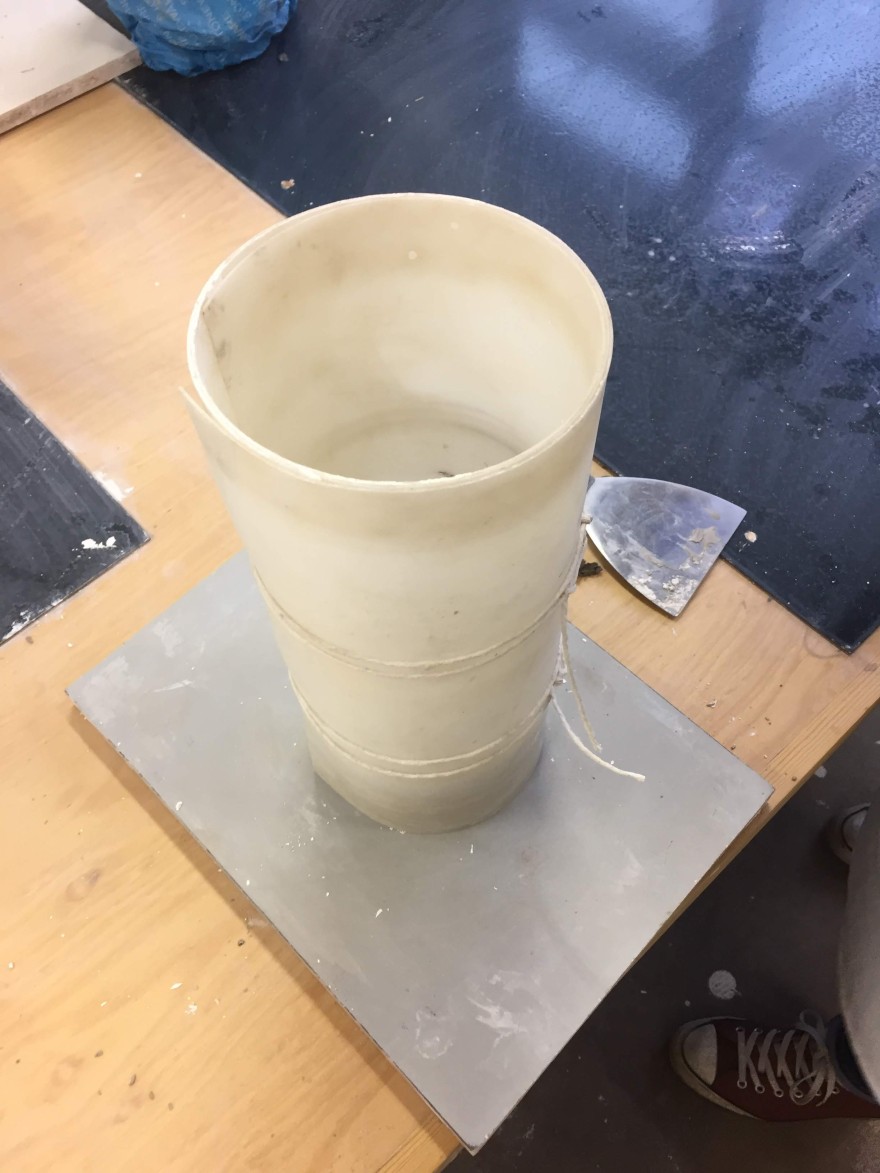
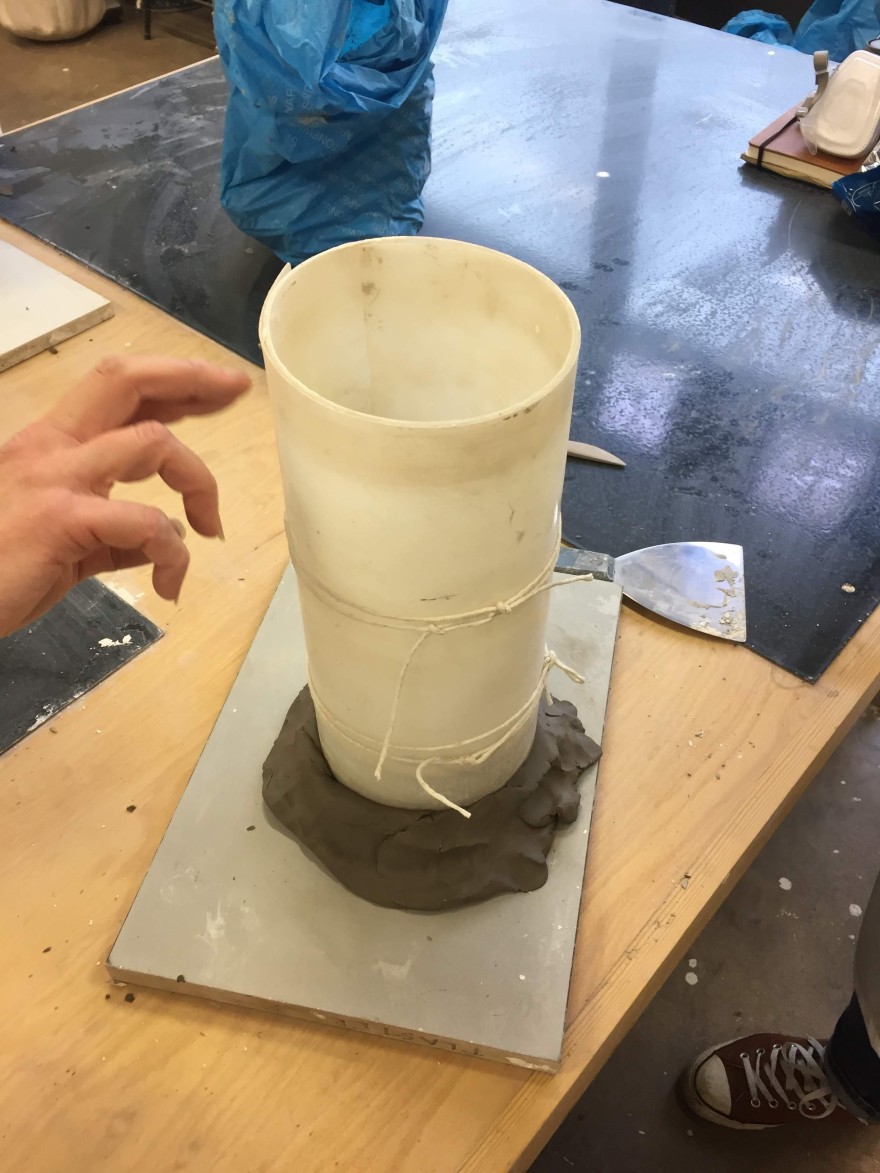
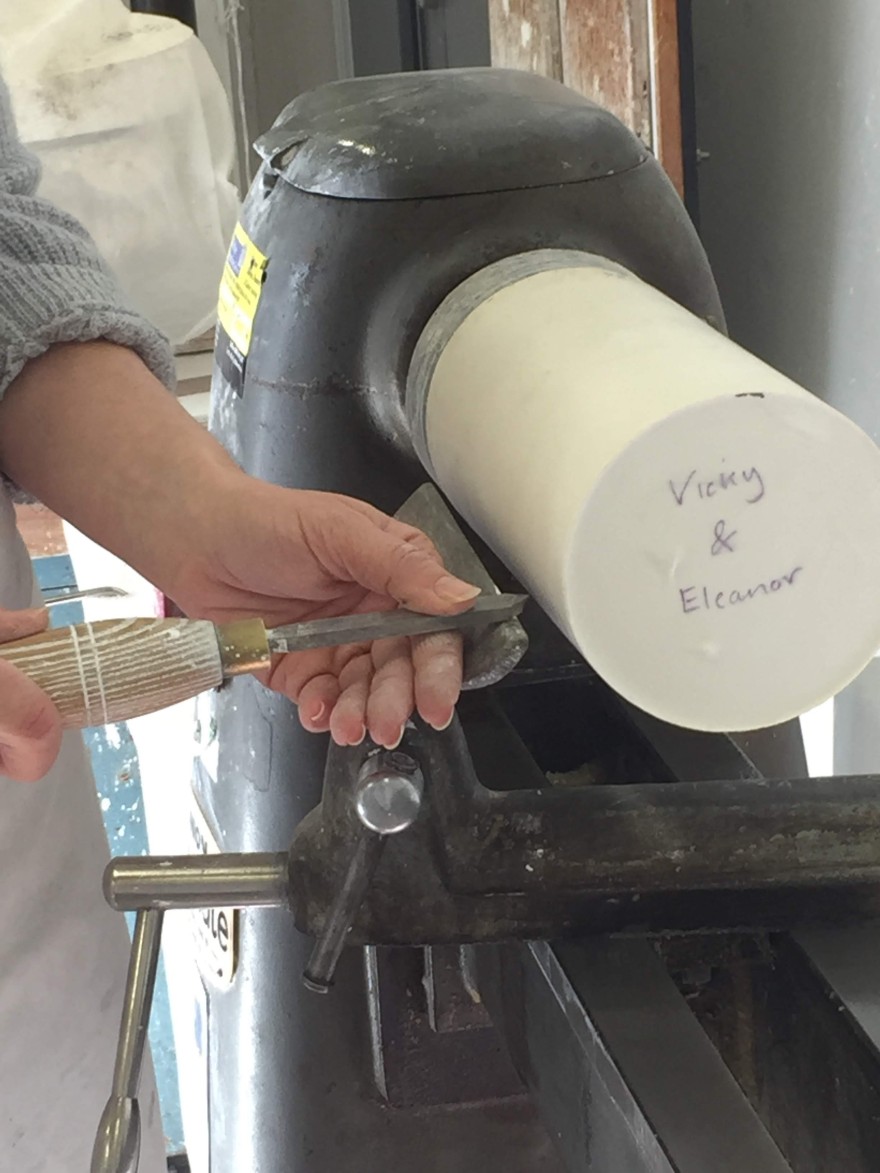
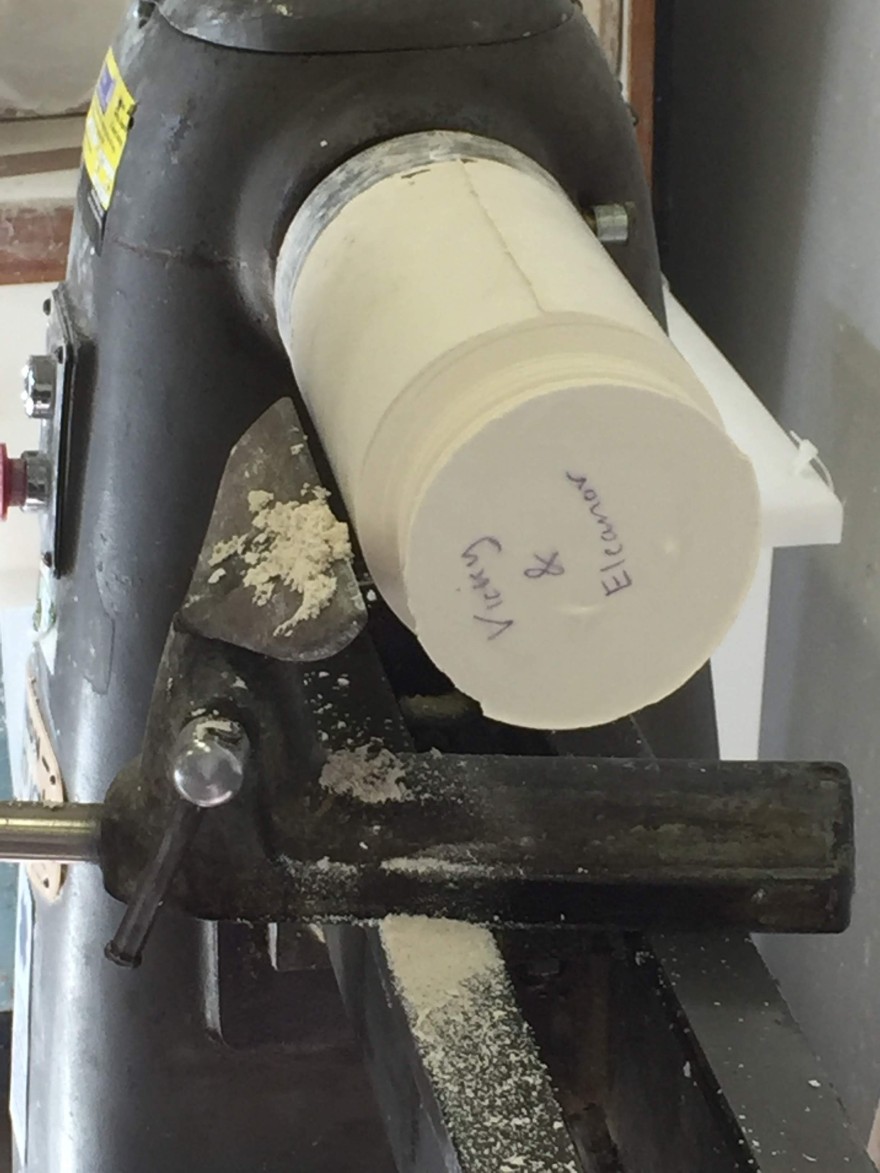
I also made 5 boxes from stoneware as test holders for the clay when its fired. The plan is to do 5 varieties of firings: 1,000C, 1100C, 1,200, 1,280C, reduction @ 1,280C. Below is an image of coils of stoneware clay used to create a reservoir for my homemade clay on a large plaster slab.
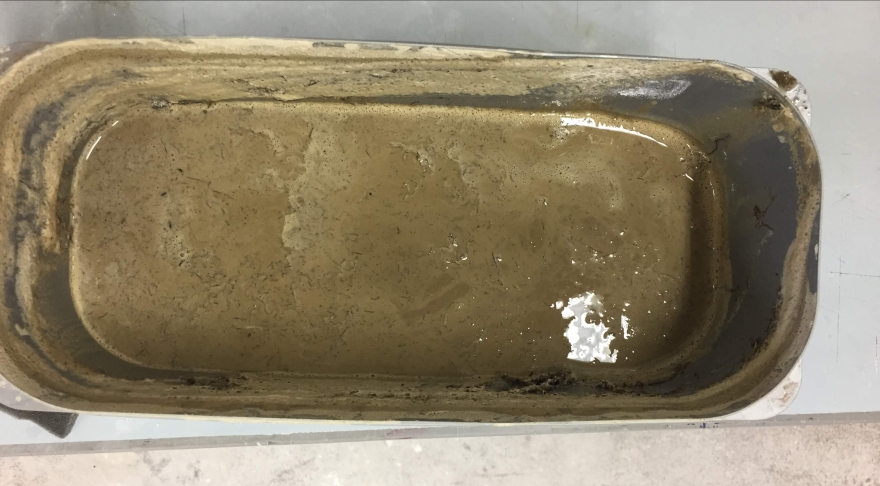
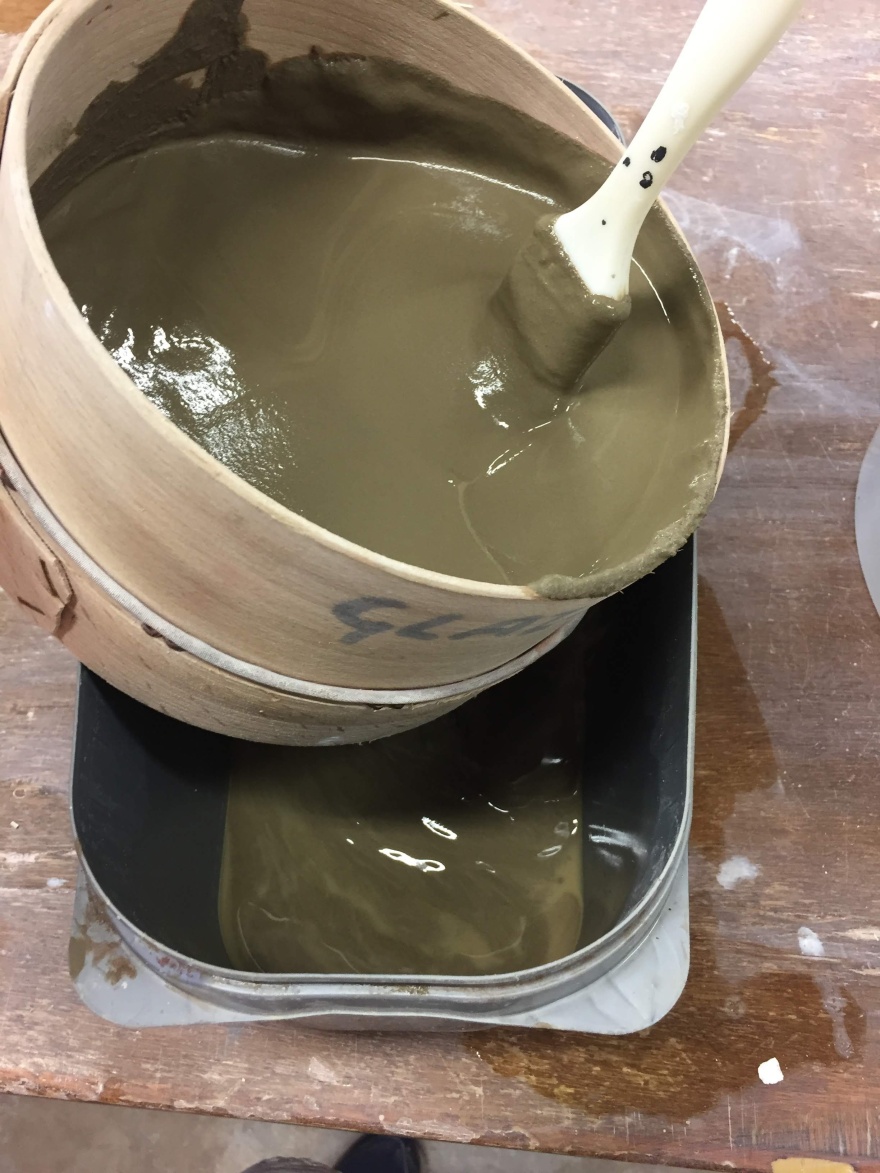
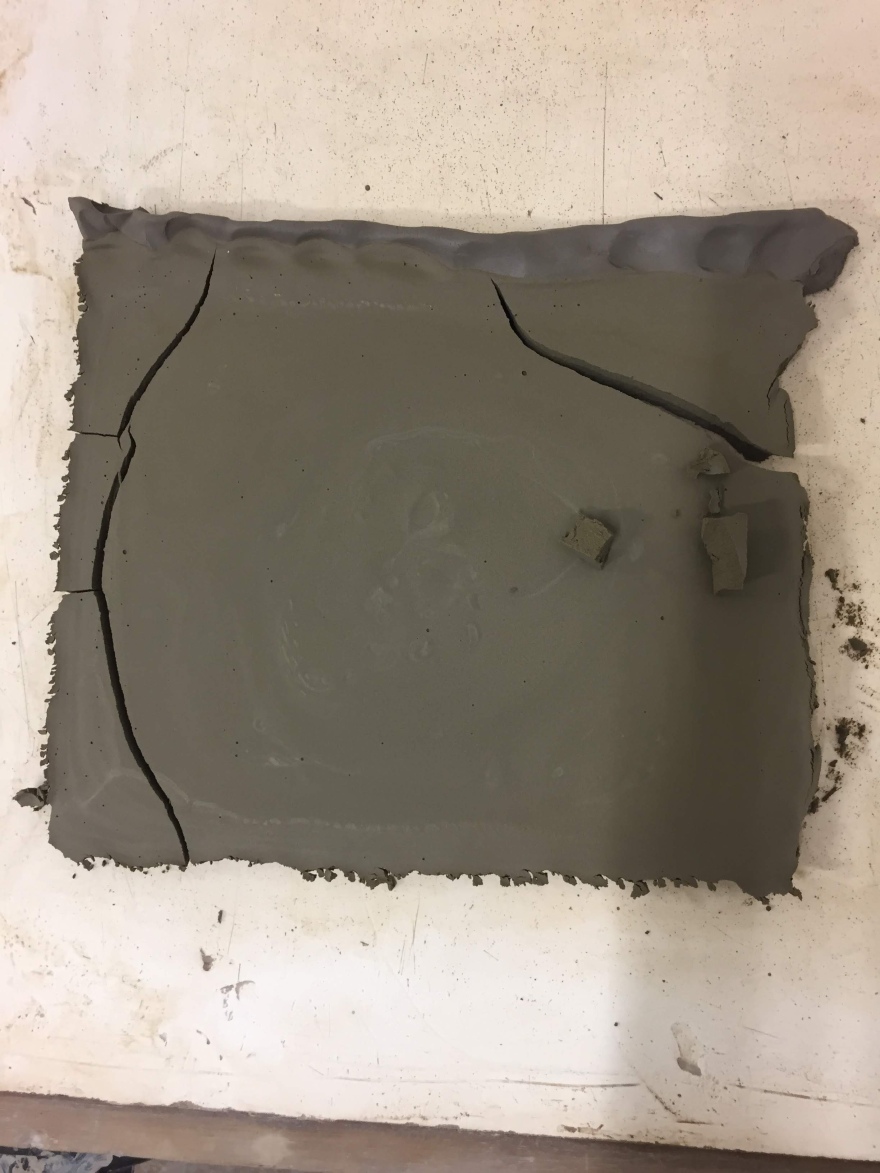
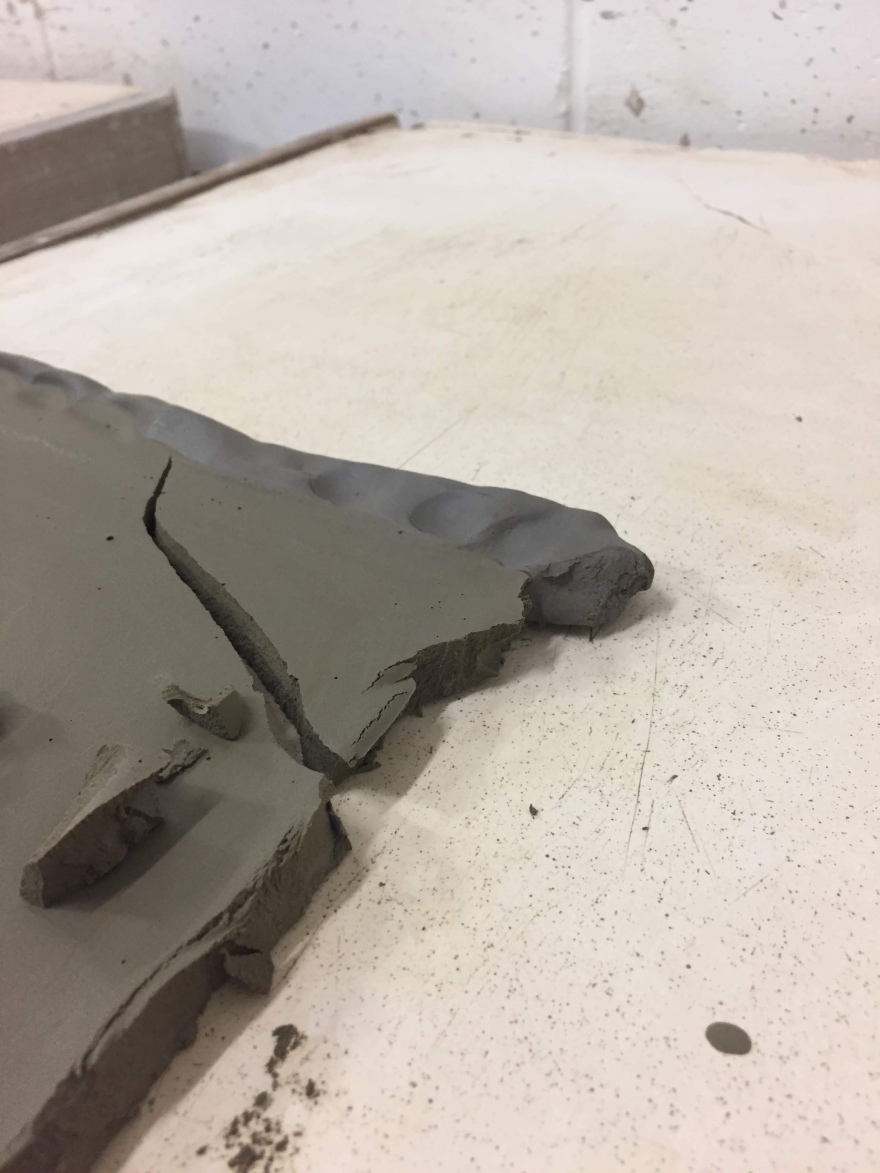
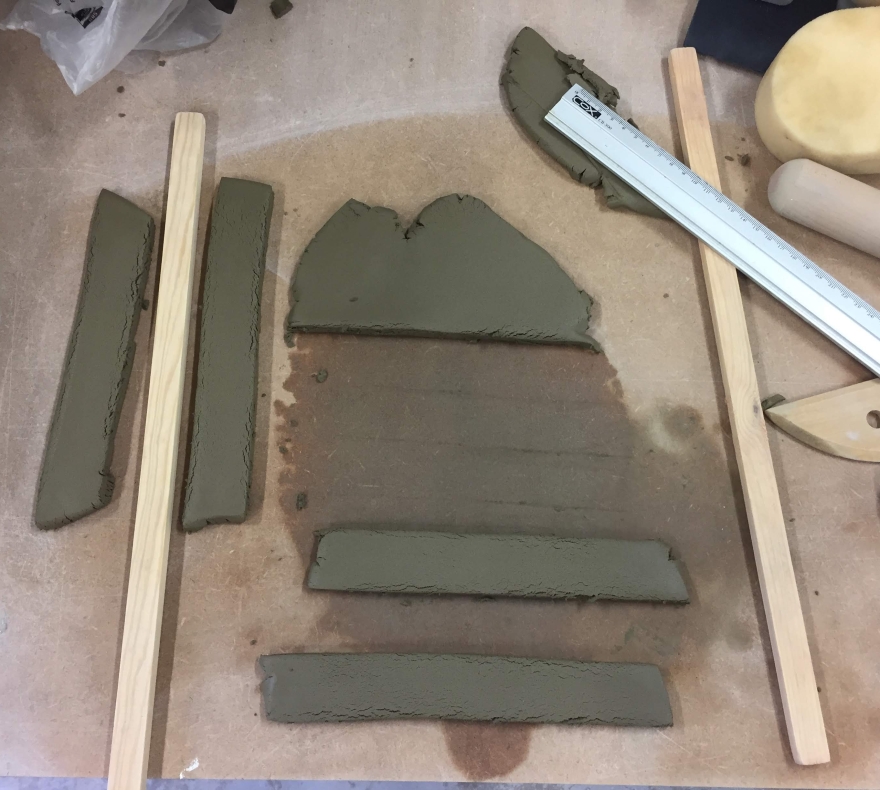
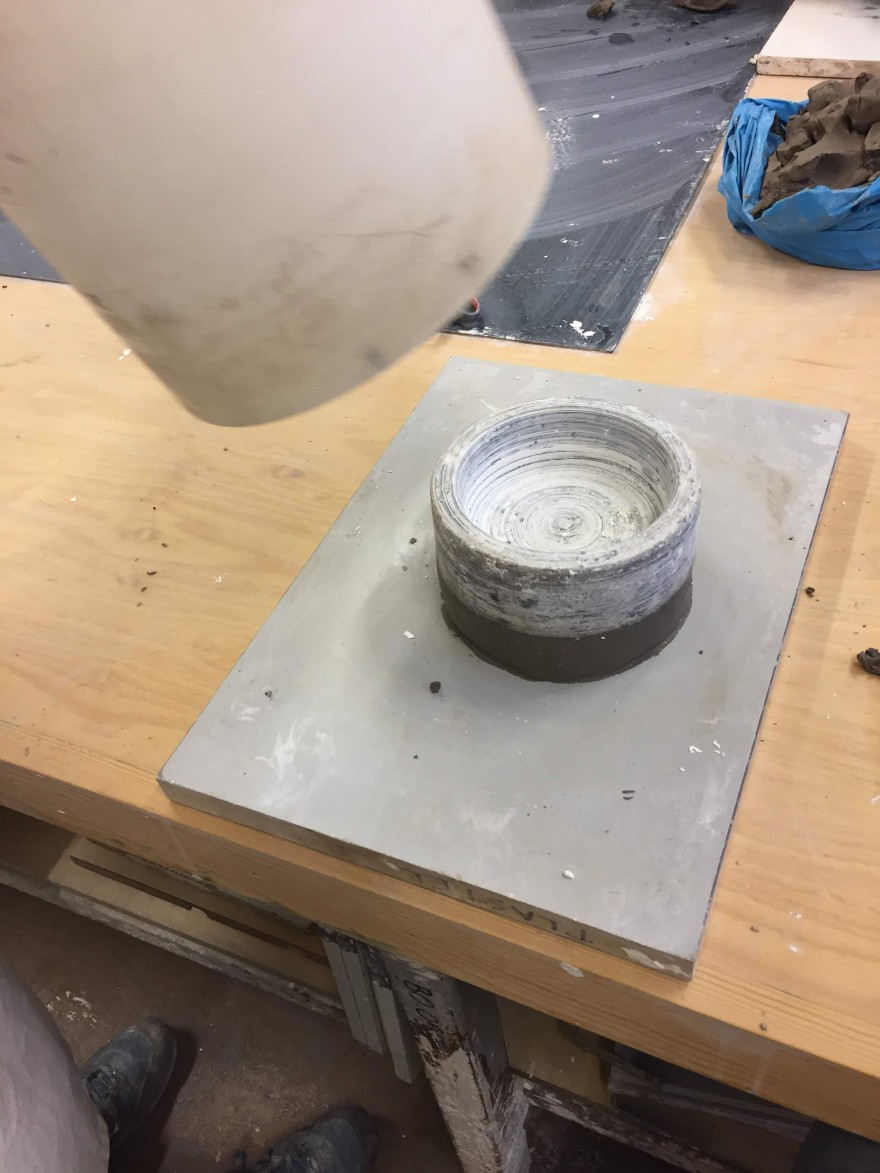
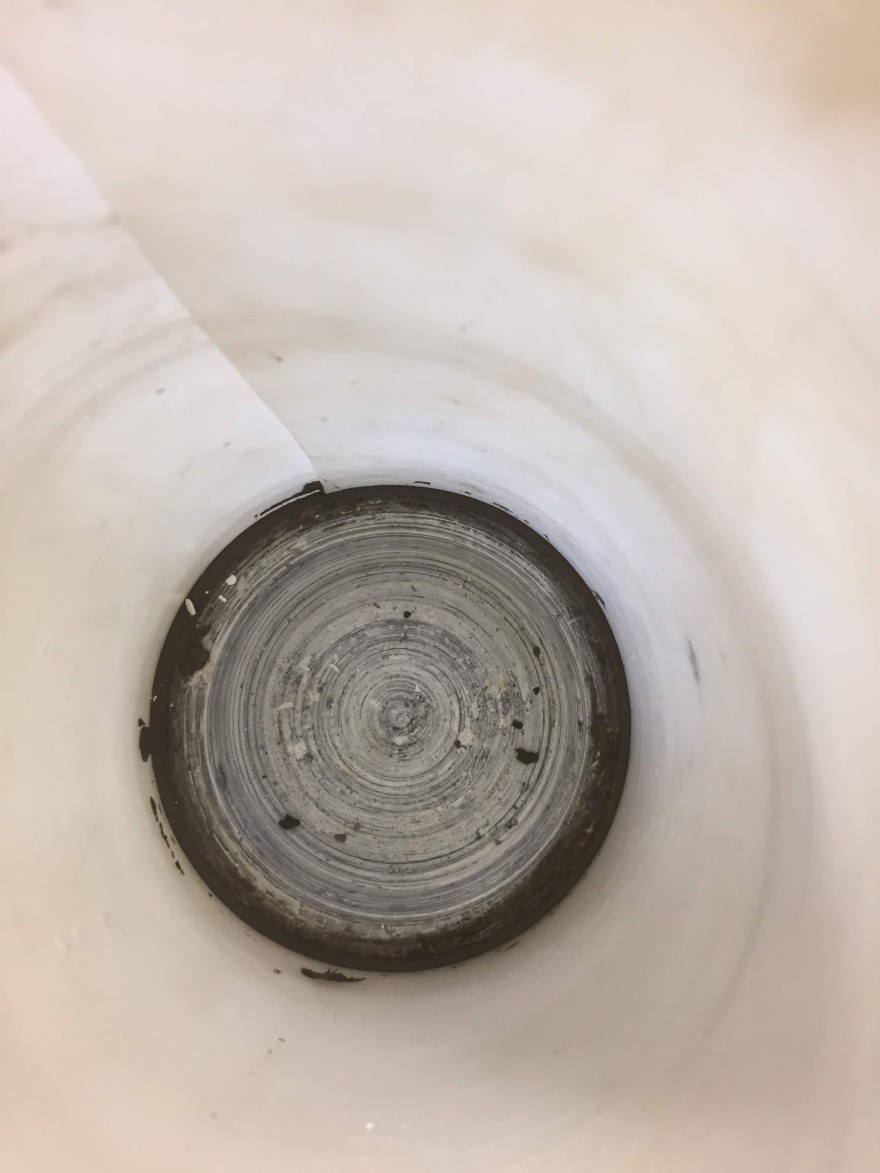
Reservoir created to hold liquid clay on plaster slabTwice sieved liquid clay poured into reservoir on plaster slay. This is to remove moisture and make clay malleable.Homemade clay after 1.5hours on plaster slab. Probably too dry now but will work with it as this is all a test process.Close up showing cracks in clay due to moisture being removed.Once wedged, I rolled the clay 1cm thick, and cut test tiles of 12cm lengthThe test tiles marked with 10cm line which will be measured again once fired to give idea of shrinkage of this clay.Image of my test tiles inside the stoneware boxes. Each tile is marked with the temp it will be fired at. It includes one reduction firing and one (bottom tile) which will not be fired at all.
The process is simple but includes a lot of different steps. Matt, our TD, was a great help and was always there to answer any questions.
Since I did all this I’ve had to come home due to the corona virus pandemic. These did not get fired. Very disappointed that I won’t see an end result but I have learned so much from doing the actual process; how this clay is very different in plasticity compared to commercial clay. I also know what equipment I need in order to do this at home. My plan is to do this at home so that I have clay processed and ready to work with once college re-opens. The process also made me more curious about the results I might get and the different experiments I can try with glazes also.
Early start last Friday to head off to London to see Collect 2020 and whatever else I could fit in during my time in the city. I was actually very excited about going to see this fair. It was almost like the night before Christmas feeling. I knew the quality of the work and level of skill would be awesome and seeing it all in one place, Somerset House, was going to be such an inspiring day. I was not disappointed.
The layout, however, might need to be reconsidered for next year. At times it felt disjointed due to the floor plan of the venue. I was unsure as to whether I had entered a gallery space or not, especially in the west wing of the house. It was extremely busy on Friday. So much so that I could almost see the terror behind the eyes of the gallery attendants. What if someone accidentally brush off a piece of work in order to allow another person pass by? In one space there was a bang on the floor….an audible gasp….then…’it’s ok, just my phone’. And that was just a space showing wall hung textiles! However, fireplaces within certain rooms gave some of the work a sense of place. It also helped buyers see the work within a home context; pieces over the fireplace, objects on the mantelpiece, and items place within the frame of a window. I think almost every room was well light and items were well displayed and hung.
Here are images from the day:
On the day I got to spend some time speaking to two artists, Edmond Byrne, a glass artists from Northern Ireland and Lorraine Robson, a ceramicist from Scotland. Both were very giving of their time and willing to answer my questions about making, processes and concepts. They also gave me some insights into how they fund their work. Byrne won the 2019 RDS Irish Craft Bursary of 10,000E which went towards the work that was on display at Collect. It was a collaboration with metal artists Adi Toch. He also said most of his work over the past 10 years was corporate commissions and also sales through interior designers seeking work for their clients. This is something I have heard before during a talk from Irish ceramicist Nuala O’Donovan, that a significant percentage of her sales were also to interior designers.She also supported the idea of exhibiting work at home shows such as Grand Designs Live, Ideal Homes etc. as a means of meeting interior designers. Robson’s work for Collect was also funded by Creative Scotland, a public body funded through the National Lottery and Scottish Government. She said this support is vital to her, especially when it comes to developing a new body of work. Both suggested I continue the conversation by email and if I had any questions to just ask.
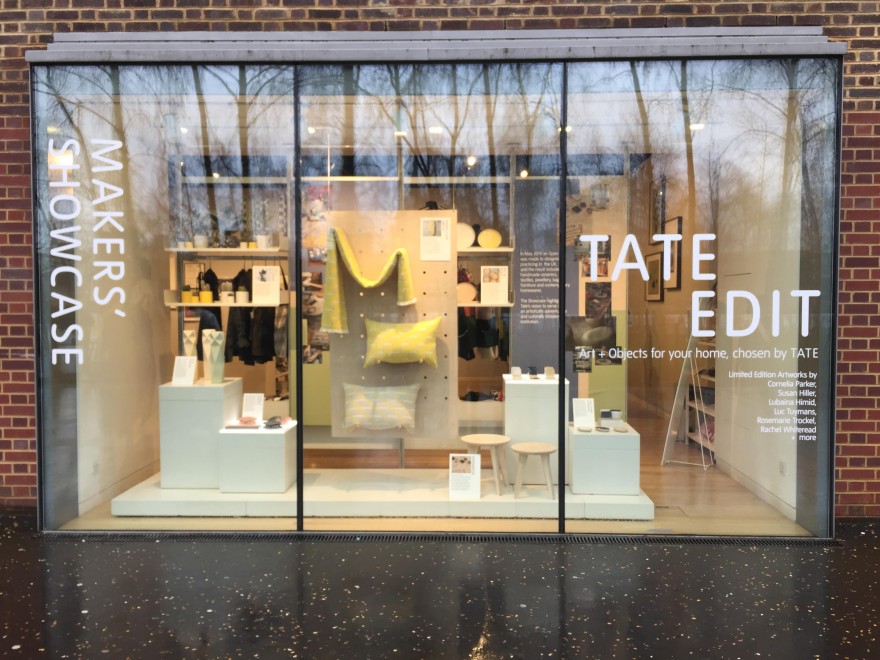
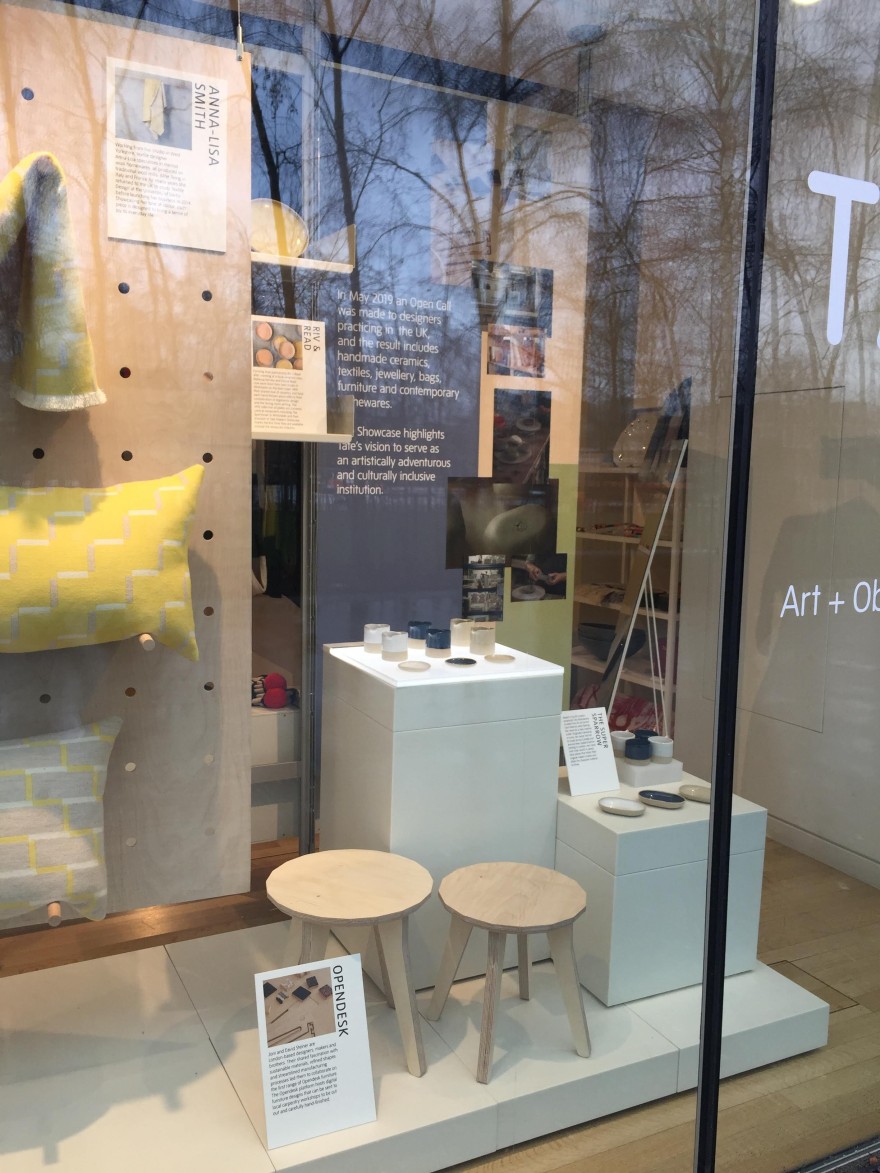
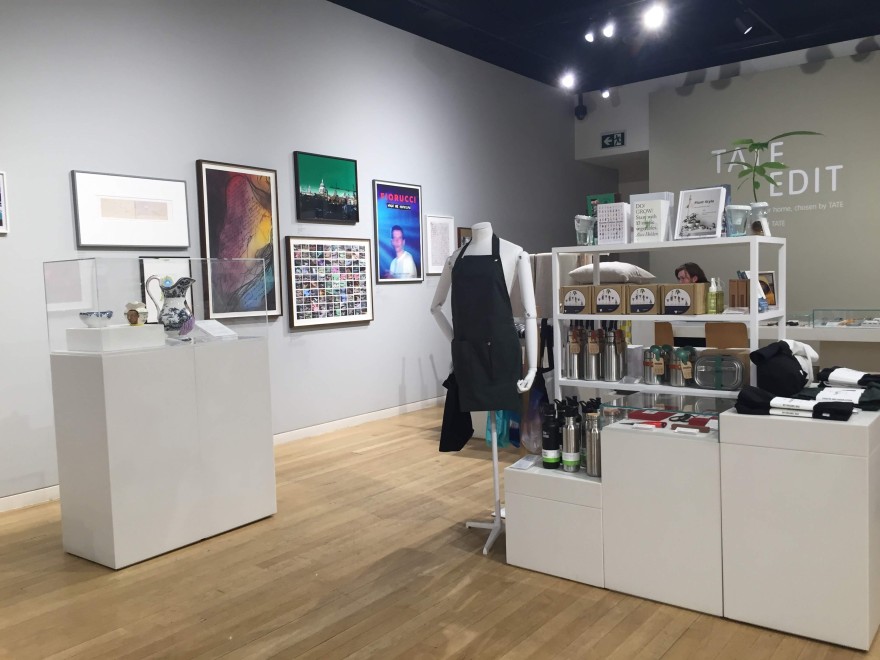
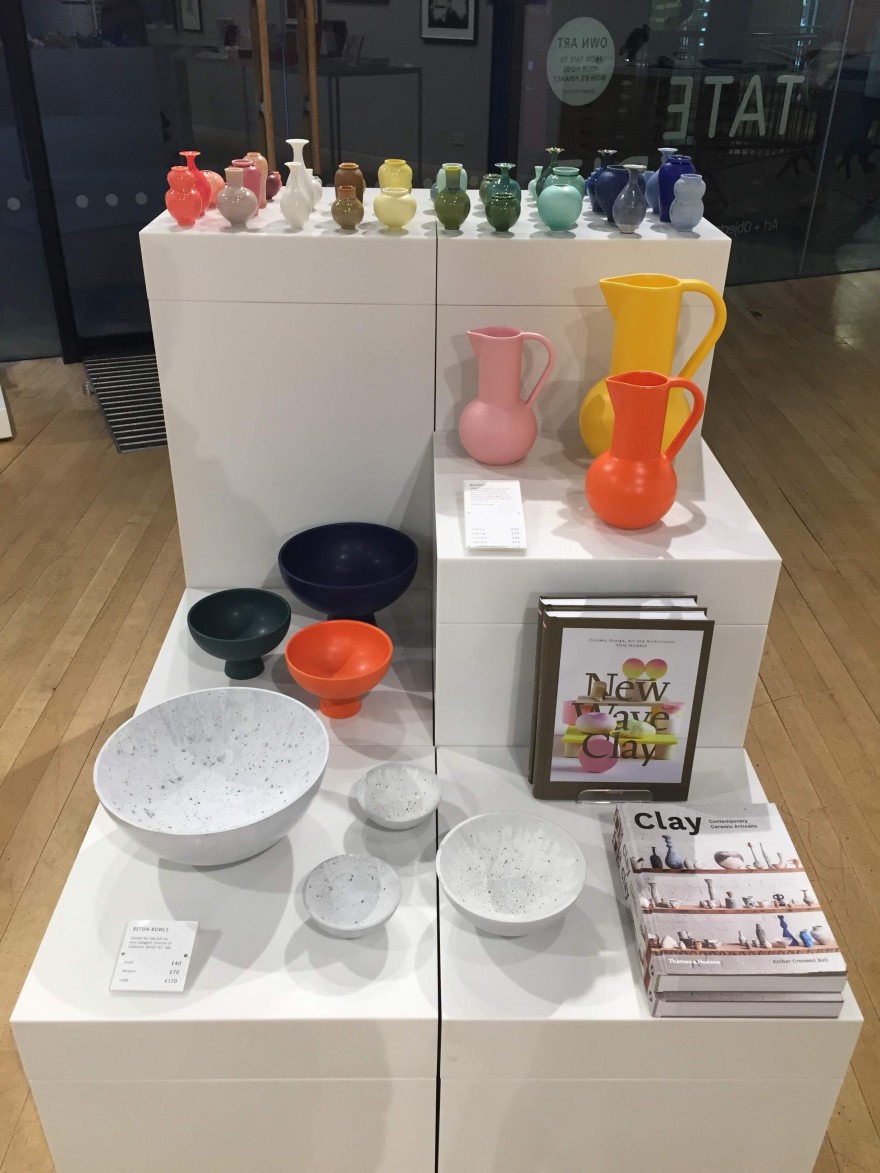
From Collect I headed towards the Tate Modern. But first, food. Three and a half hours of strolling through Somerset House meant I was very hungry and in need of a sit down. It gave me a chance to go through the fair catalogue properly, write a few notes before I’d forget. Before I even entered the Tate I got a bit of a surprise. I wasn’t expecting that the first thing I’d see near the doorway was a retail window stating ‘MAKERS’ SHOWCASE’ and displaying craft makers’ work, see below. The Tate Modern would be considered a bastion of fine art, not a site for makers or craftspeople. The surprise continued inside.
Gallery number 4 is given over to Materials and Objectswhich includes 13 rooms exhibiting work by artists using materials and objects in their work. The museum was giving praise to materials and the artists who explored the qualities of various materials.
I took a photo of this because it’s a question that I think can be quite difficult to answer, or at least it is for me. Whenever I’m working through a problem it’s the material that often ignites the idea.
I like that the Tate are highlighting the materiality within artists’ work. The Tate acknowledges that it was Duchamp’s challenge to the plastic arts in 1917 that set in motion the movement by artists towards different materials to create their work. I really enjoyed the variety of work on display including Joseph Beuys, Doris Salcedo, Mrinalini Mukherjee and Sarah Sze. Inspiring to see how these artists use everyday materials and object to express their concepts.
So I braved it. I got a bag of terracotta clay and I walked into the throwing room like it was my second home. Me, with imposter syndrome? NEVER!
Figuring out the throwing wheel
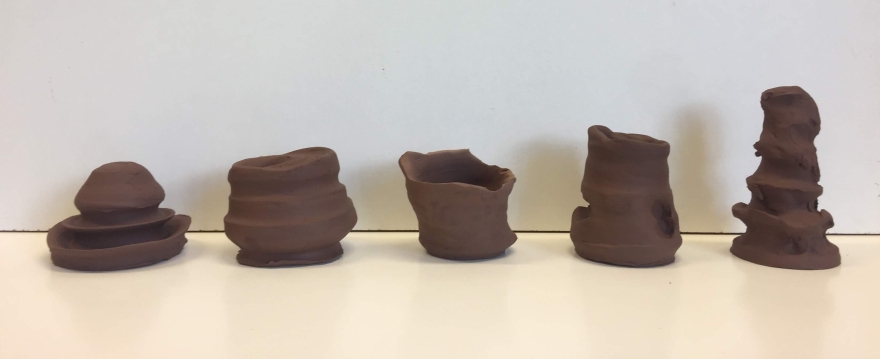
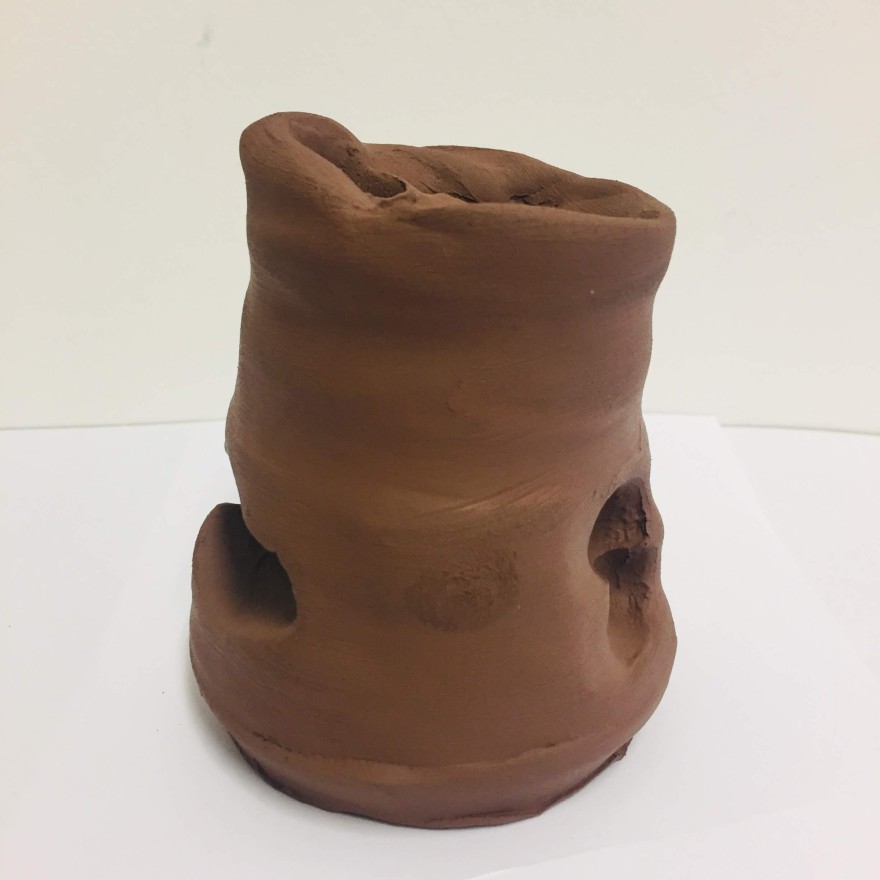
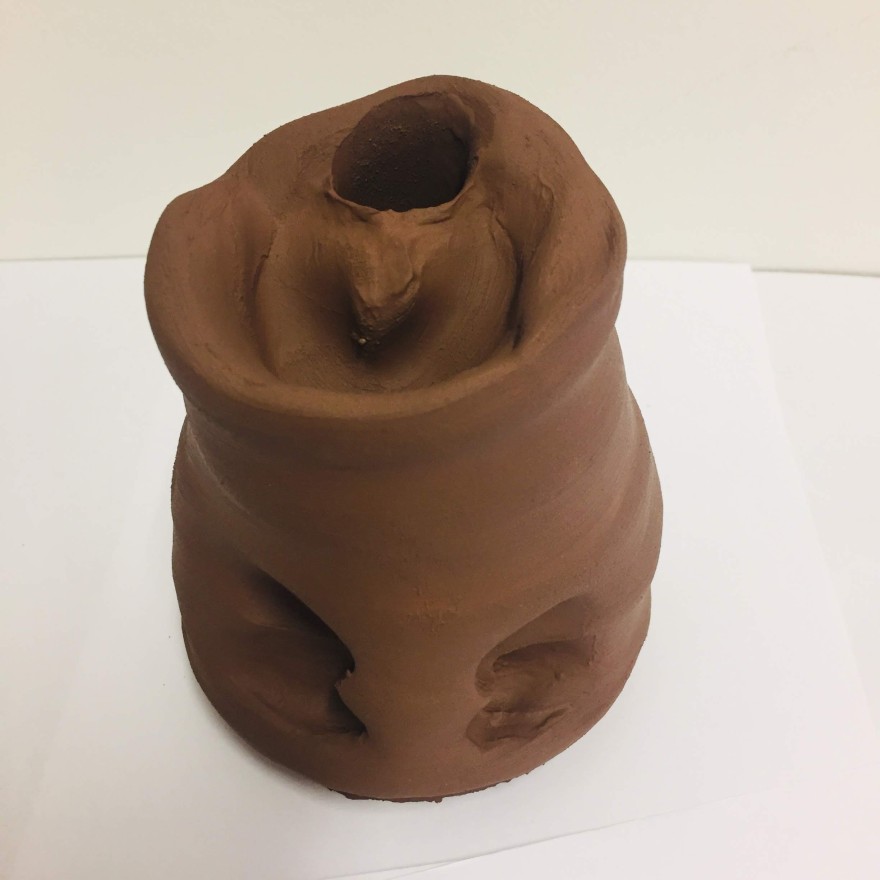
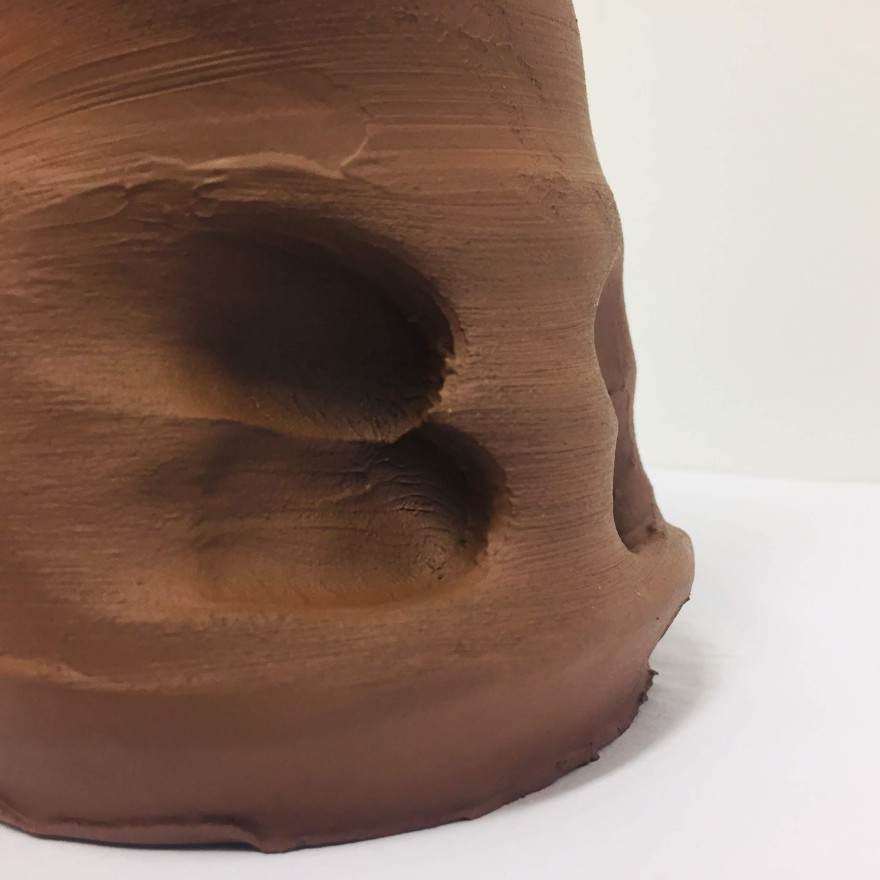
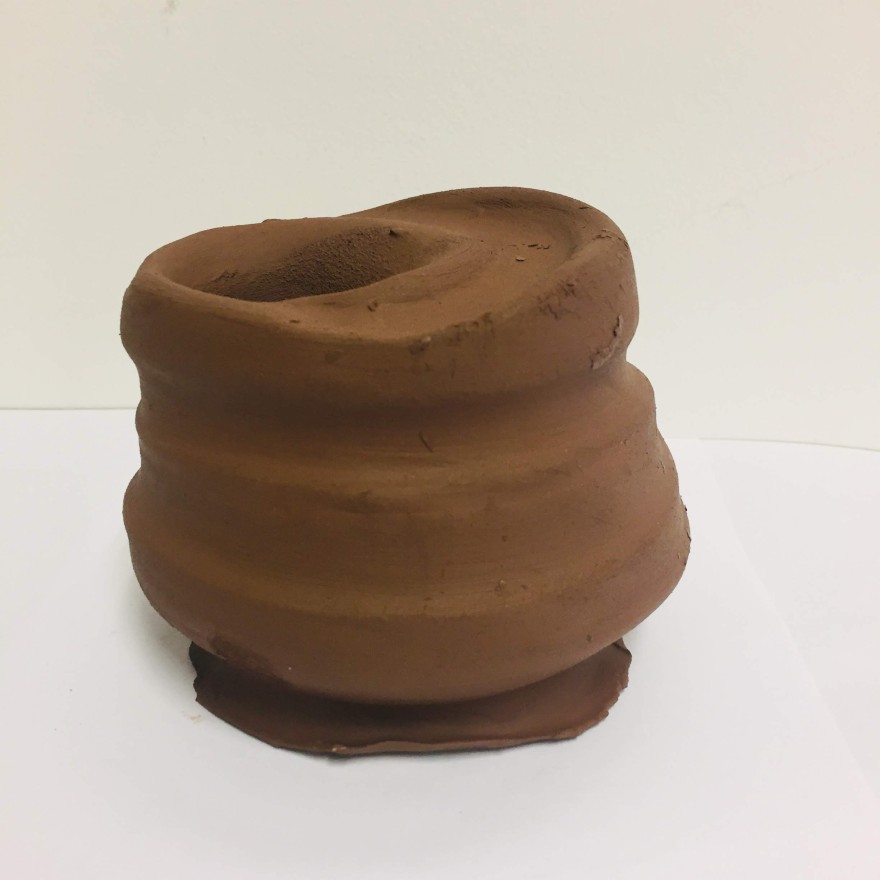
Ha! I doubted what I was even doing there but, as I got familiar with the space and working at the wheel, it all felt more comfortable. My task was to play with the clay whilst thinking of a particular memory. As it turned out, the memory I focused on was of my grandfather, Bill. Like I’ve said before in a previous post, it’s best to stay with one memory for clarity and focus. The background noise in the room was a bit distracting at times but there were moments of peace and everyone was caught up in their work. I closed my eyes and thought of that day. The heaviness, the water, the panic, the sadness. Each piece that my hands formed was from feeling a part of that memory. Literally handling the memory in clay. The grain of the clay moving through my hands made it feel real, raw, abrasive. I dug, pinched, squeezed, pressed the clay. I skewered my fingers and thumb into the clay. Playing, testing, feeling.
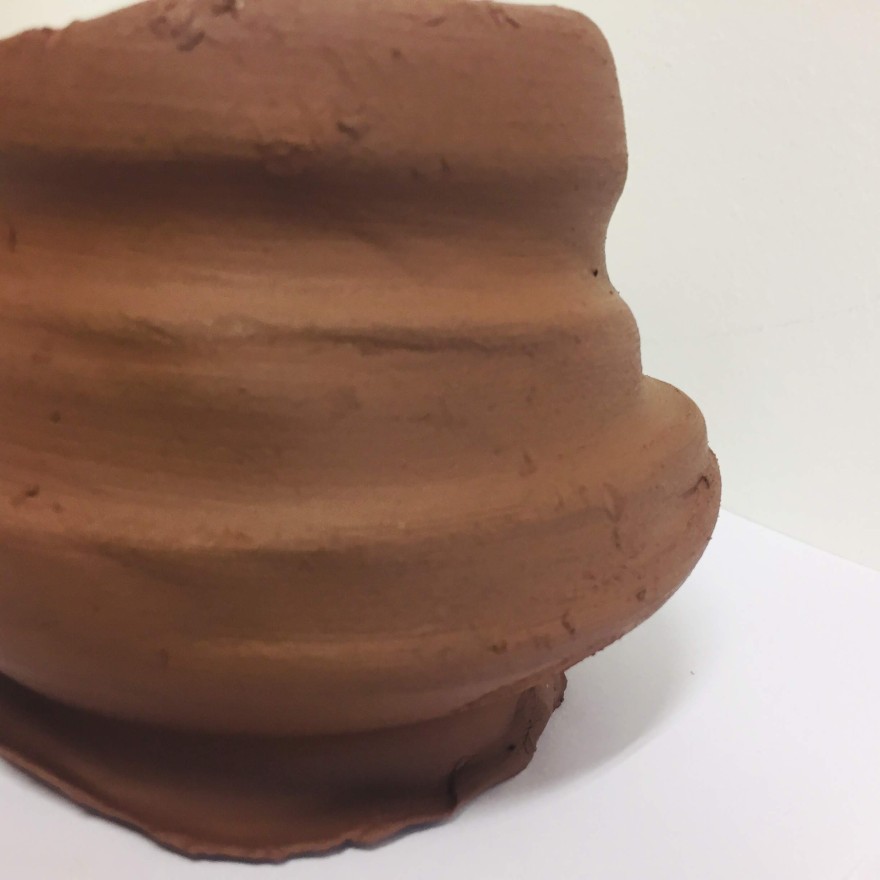
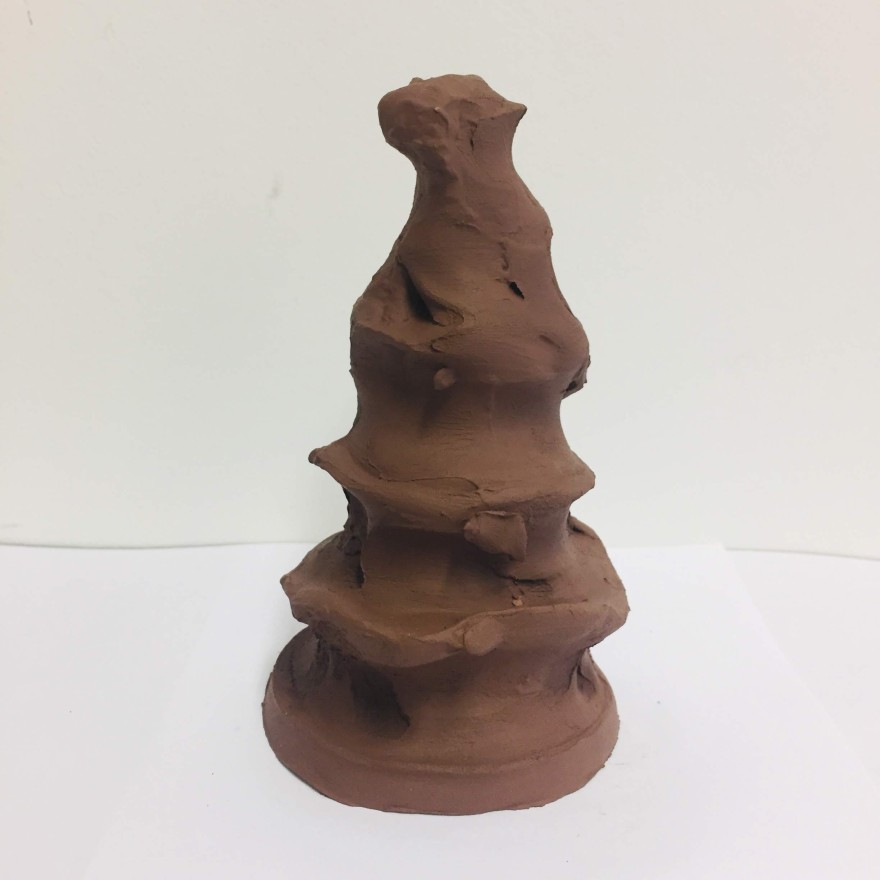
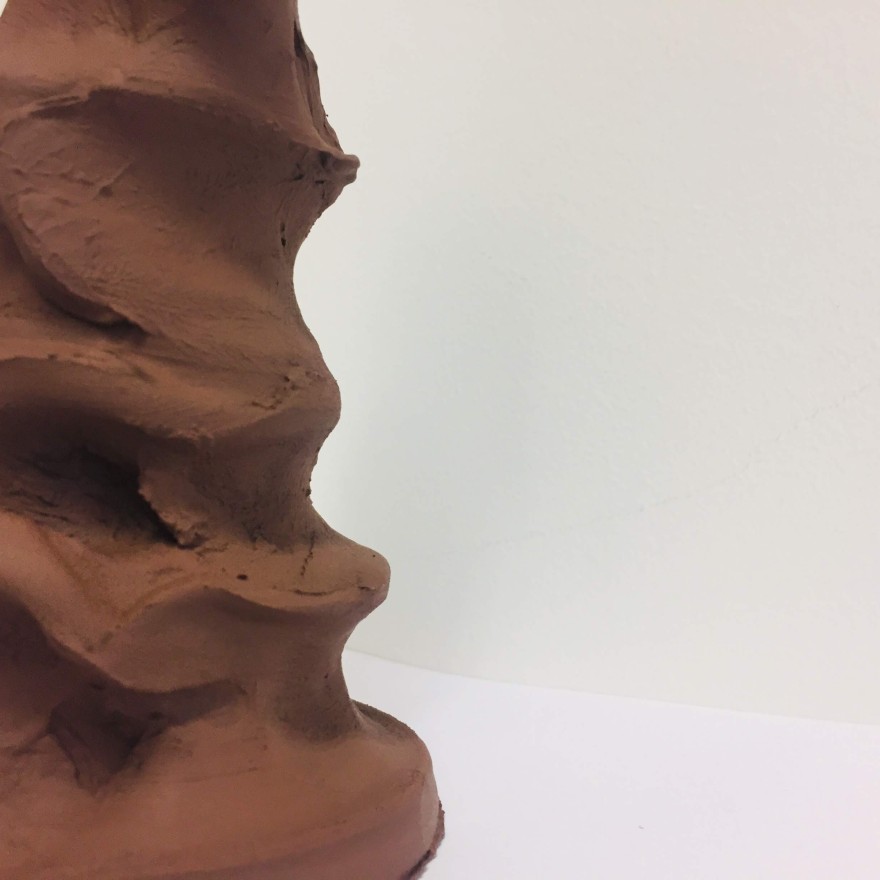
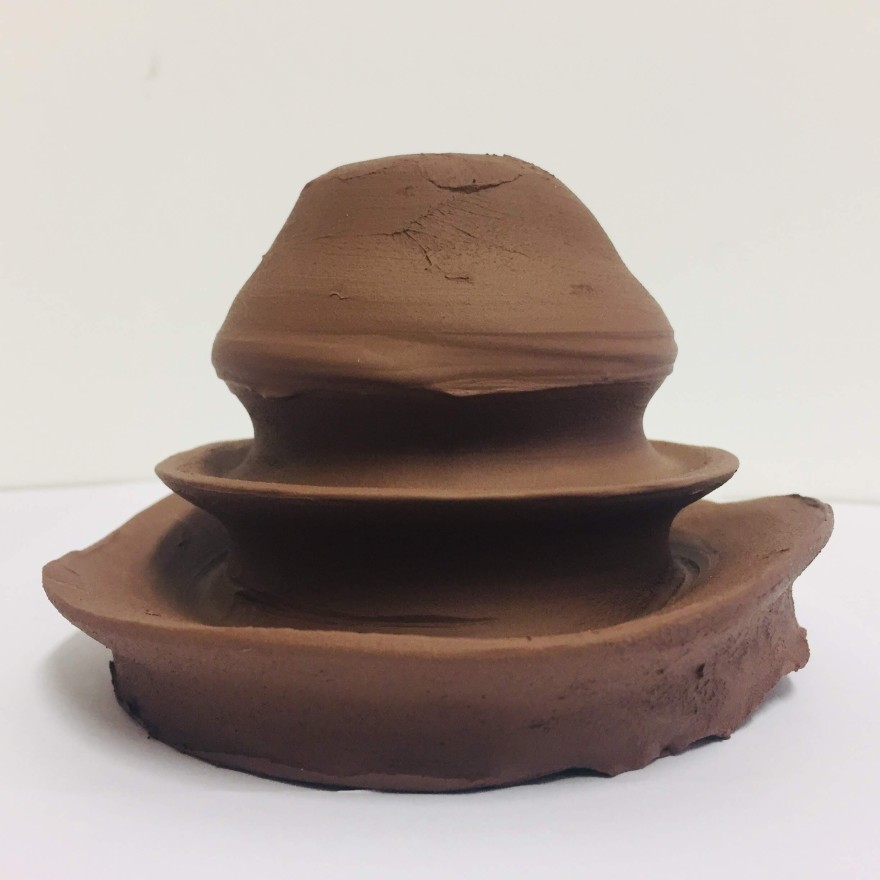
Five forms thrown at the wheel
Each piece clearly shows marks from my hands and fingers. One particular form I prefer from the five can be seen below. There was a feeling while making it of working through the memory as my thumb pressed into the clay. The asymmetric hole in the clay seems to mirror the feeling of being thrown off centre by the experience of that whole day. As the wheel was moving with my thumb in place, I had that sense of being spun out of control, both mentally and physically. The hole also made me think of the trough my grandfather fell into. Strangely, the hole simultaneously seems to be empty but yet, is full of sadness or melancholy. I wonder what would happen if I poured water into it? Or should I fired it and then put water inside? Would I glaze the piece or not? All questions for another day.
As part of this Create module we must think of our place within the world of art, design and making. It’s an opportunity to look into different contexts into which our work might fit. As each person’s work and practice here is so different, the resulting research will be varied in its outcome. It’s a time to reflect on what I do and where do I see my work and myself within the professional art and craft sphere.
Now this is not an easy task. Firstly, it brings to the fore that truth which all students try to ignore……that college life and the safety of the learning environment will come to an end. And then what? Where do we go? What do we do? Like lost ducklings students stumble out of college unsure of what direction to take. But that’s ok, that’s part and parcel I believe. It’s still learning, just without the four walls of the college.
Secondly, the world of art, craft and design is so varied and full of opportunity that the problem is where to begin. Apply for a residency or put a proposal together for a gallery maybe with some other ducklings or try to work for someone else, get a footing within the industry? Lots of options and all right because, again, it’s all learning.
And finally, the ultimate question which such a task raises…..is this really something I want to do? Like really, should I forget it all and go back to retail or something? Luckily, this question gets shot down as quick as it raises its head above the parapet. Making, doing, creating is part of who I am. It’s not a choice. I know full-time work with decent pay in this industry is rare, nay, none existent. But as long as part of my day is making, doing or, even thinking bout either, then I’ll be happy.
It’s been a week since I last posted and that’s partially due to fact that I’ve have had a serious rethink about my ‘wall of clay’. I spent the weekend looking at the practicalities of it and came to the conclusion that now, within this 6 week time frame, was not the time to do it. There are a few different factors: time, money, resources etc. I also thought that it wasn’t authentic to my idea as I really wanted to use clay from the farm rather than bags of processed clay. At least the farm clay I could return to the earth unlike the bought clay. Sustainability is more of a consideration now since I’ve come to Cardiff. It is a project I would like to do, just now is not the right time. I spoke with Pip too and she agreed.
It’s a weird thing to be disappointed about a project that I decided to postpone. I’m representing both sides of the debate, for and against. ‘For’ is passionate and all gung-ho, ‘against’ is logical and pragmatic. I’m not a fan of ‘against’ at the moment but we’ll make up. It’s taken me a couple days to move on, try to think of another way to approach my issue; how do I make memory physical? That film I made, what does it look like in 3D form? A throwing workshop I did last week helped me move on. Over the weekend I was thinking if throwing could be a method of working my problem.
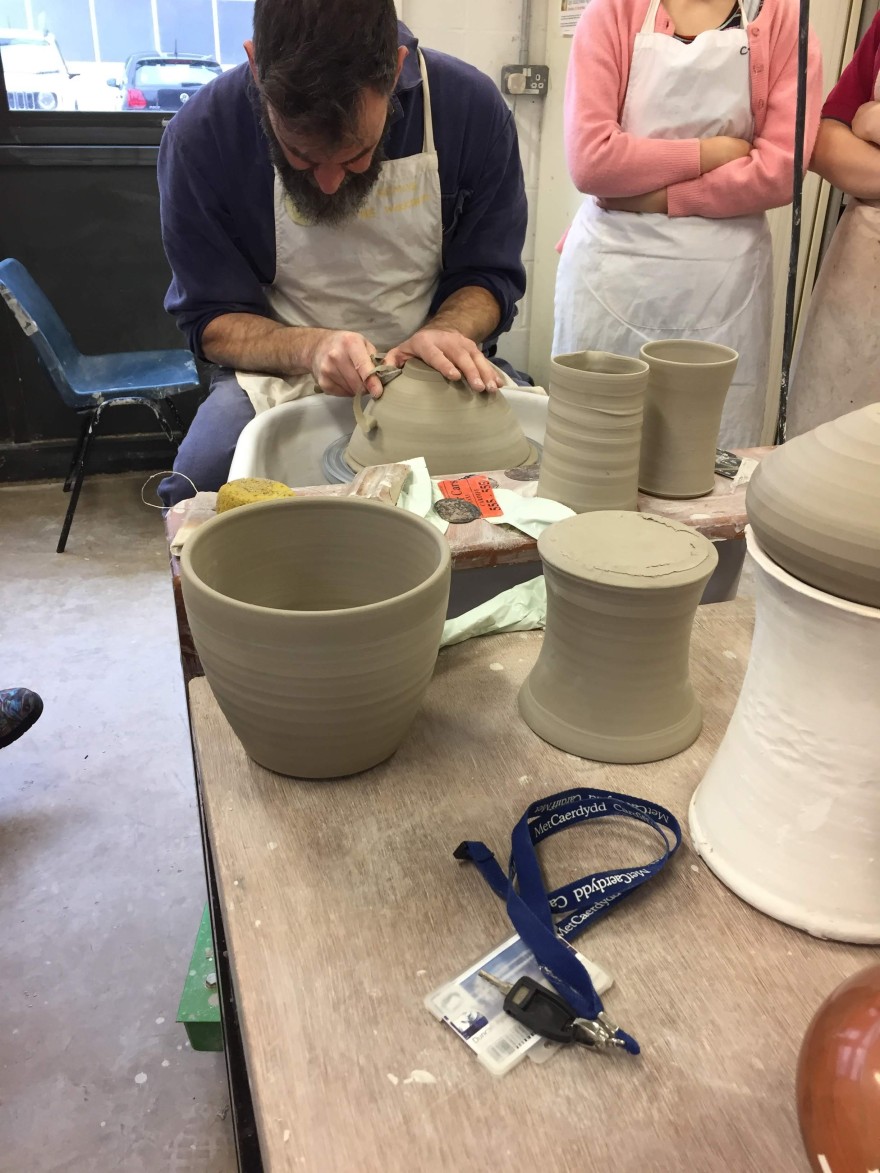
Throwing is such a popular way of working here and I only spent a few hours ever working at the wheel that I wanted to give it a go while at Cardiff Met. I found out there was a workshop for the level 4 Maker group and when I asked to join, it turned out there was one space left in the class. Duncan Ayscough was giving the workshop and showed us how to throw but also turn clay on the wheel. I was fascinated by this latter process as it opened up the possibilities of what is achievable at the wheel with raw clay and leather hard clay.
Duncan demonstrating turning on the pottery wheel during the throwing workshop
Whilst sitting at the wheel I wondered about my memories and what effect thinking about a particular memory might have on a piece of clay as it was turning. It’s that theory that the mind and hand are equal, both thinking and making together. Maybe if I close my eyes I can use my ‘mind’s eye’ to help. Using the wheel as the control element to my experiment and my hands as the variant. I’m curious to try and you just never know what comes from trying and experimenting. I have a bag of terracotta clay and I hope to go to the throwing room tomorrow after my Wednesday plaster lathe workshop.
I mentioned this change in approach to Pip, once we had come to the conclusion that the ‘wall of clay’ was for another time. She encouraged me to experiment with throwing as it’s relatively new to me and an opportunity to develop a skill whilst on Erasmus. She also suggested researching Ceri Jones and the Language of Clay exhibition. I’m still hoping to get a chance to speak with Natasha Mayo about the Sensorial Object exhibition from 2015.
Jo Dahn’s book is an excellent source to show how varied the world of clay can be. She has broken the book into the myriad of ways contemporary artists are using clay. From installation to performance to raw to figuration, this book highlights expanding ceramics and its place within the art world. Many of the artists included in the publication have in some way been through the doors of CSAD either as students or tutors. So inspiring to know that where I am is a place pushing contemporary applied art in new directions as well as fostering traditional craft techniques.
From a distance…
My research is focusing on the phenomenology of memory, both my studio and academic work. Something dawned on me today that it might be interesting to use this opportunity of being away from home, away from those sites of memory, to try and work with them from a distance. What impact does it have? If any? By not physically having access to the farm yard and having to use secondary material like photos I took as part of my visual research from last year, does this affect the method of working?
There’s a feeling of frustration that I can’t go back to specific places to experience them, I’m solely using my memory. It’s odd. The irony has not escaped me that my project is about memory and yet, now that I have to rely on it, I’m getting annoyed about that fact.
My mind has settled after yesterday and from the epic weekend of reading. Thinking isn’t as strenuous today. I have been thinking about my video from last semester, below, and the wondering how do I make this into a physical form while maintaining the idea behind it.
My spider-gram with memory in the middle lead to several words including clay and landscape and identity. I looked through ideas I had from last semester which I had wanted to continue into this year. One included using clay from the fields at home. More so to try and create my own clay body and/or slip. This got me thinking about the landscape again, and the vastness of the broader countryside around the farmyard.
What if I scaled my video up? What if I tried to move the idea onto a bigger scale? A wall of unfired clay, terracotta, as big as I can make it. 8×4 comes to mind, but maybe bigger. A wall of clay with the water oozing down laying trails into the clay dripping into a collection point underneath. Perhaps a water trough. Like the concrete one on the farm. In my minds eye I see it, feel the overwhelming presence of the clay, hear the drips/trickles of water moving over the clay and dripping into the trough at different points. I can smell the wet clay. It speaks of those fountain memorials to the dead, the instability of memory, the shifting of memory from one entity to another (solid clay to liquid clay), the passing of memory as the water moves over the clay, clay as burial medium, as Rosalind Krauss puts it ‘the memory is the medium’.
How is the other question? Supportive structures underneath, concealed shelves spreading the weight of clay over the whole piece. Where does the water come from? Narrow tubing with pinholes releasing water in a slow process of seeping. This I must look into and test but at this stage the idea has grown on me.
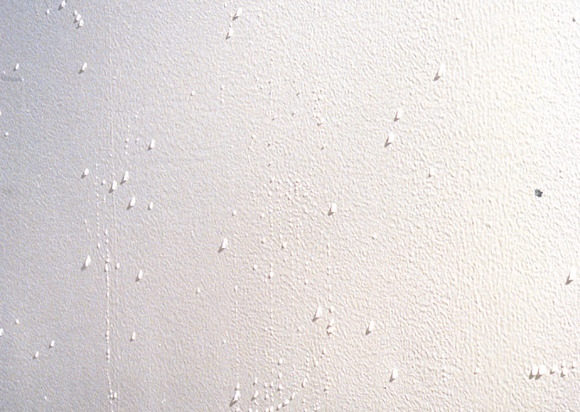
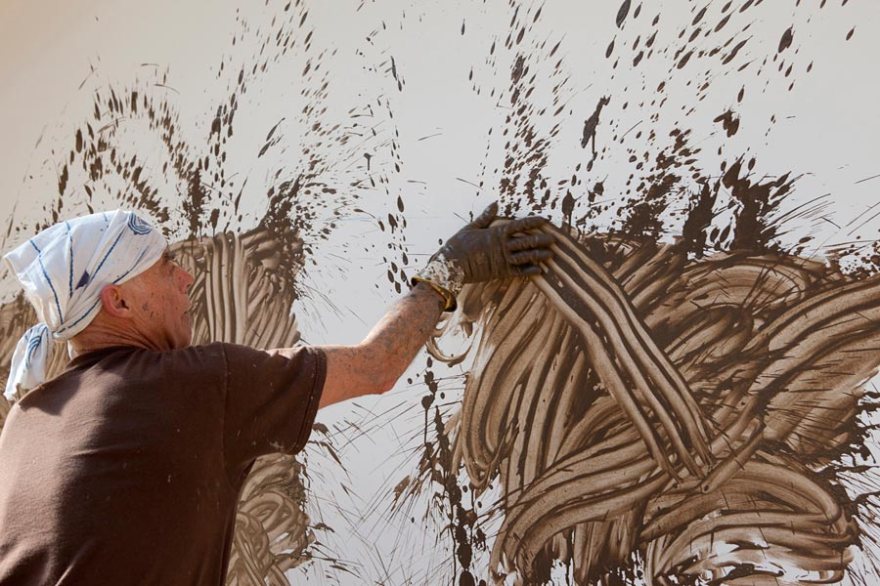
Other artists come to mind like Ann Hamilton and Richard Long. Hamilton’s work kaph, 1997 at the Contemporary Arts Museum, Houston was like many of her works; all consuming in both mind and body. The constructed walls, below, had water seeping from tiny holes placed into them. The sense of sorrow and mourning I read from this is almost overwhelming. The subtlety with which she does this is unnerving. Hamilton tugs on the senses of the body to evoke such emotions. I want to try and create a similar effect in a viewer.
Detail of water oozing from walls as part of Hamilton’s kaph, 1997
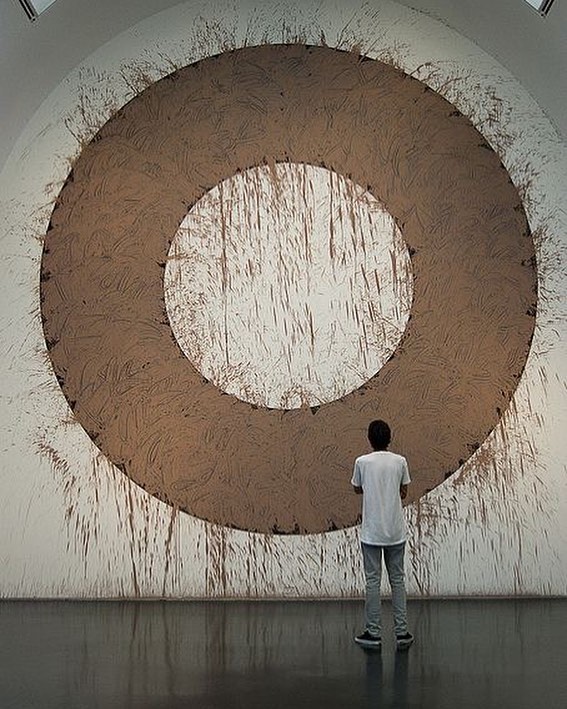
Bristol based artist Richard Long uses wall as canvas and clay as medium in his work. Clay as a component of the natural landscape is used to start a dialogue between the landscape and the viewer. His piece Chicago Mud Circle, 1996, is such a piece. Although circles feature frequently in his work it is his use and interest in clay that draws me to his art practice. I strongly feel a connection to his work and how we, humans, leave our mark on nature.
Richard Long, Chicago Mud Circle, 1996Image shows Richard Long’s process of applying the liquid clay to walls.
Today our Artist Designer Maker group came together for the first time since I arrived. We were given the brief for the next project by our year head Pip Lawrence. I had a little insight into the project as most of the group were aware that it’s an opportunity to work on our own research. Back to the beginning.
However, having spent the past four days doing research for the academic side of this course, I feel unable to think clearly. Reading academic texts and articles about memory has frazzled my brain. My mind has been trying to grasp what Henri Bergson meant by Pure Memory and whether Marcel Proust actually liked madeleines. As an aside, he was originally going to use toast within the novel but by the third draft it had become the sweet french cake.
I know the reading will seep into my brain cells and eventually influence my making but right now I can neither read or make or, for that matter, think. Hence I am here, writing, in the hope that by alleviating my mind of even these simple ramblings I might clear productive space in my mind. Reader…I don’t know if it’s working.
I did, however, have a very interesting tutorial with Pip. A full on discussion about the role of the artist and making in society. She also helped me understand that my way of moving between various materials and techniques is a legitimate method of working. Sometimes I felt like I was lost, just hopping between materials and working with whatever came to hand. Now I realise that its my modus operandi and that it works for me. I know that when I work with any given material or technique I try to understand it fully, its limitations and its possibilities. Perhaps I will never be an expert in clay or textiles or glass, or any material for that matter, but I will be an expert in my way of making. So far it hasn’t failed me. And even if it does I’ll learn from it.
This post is going to include all the workshops I attend whilst at Cardiff Met. I will update as I go.
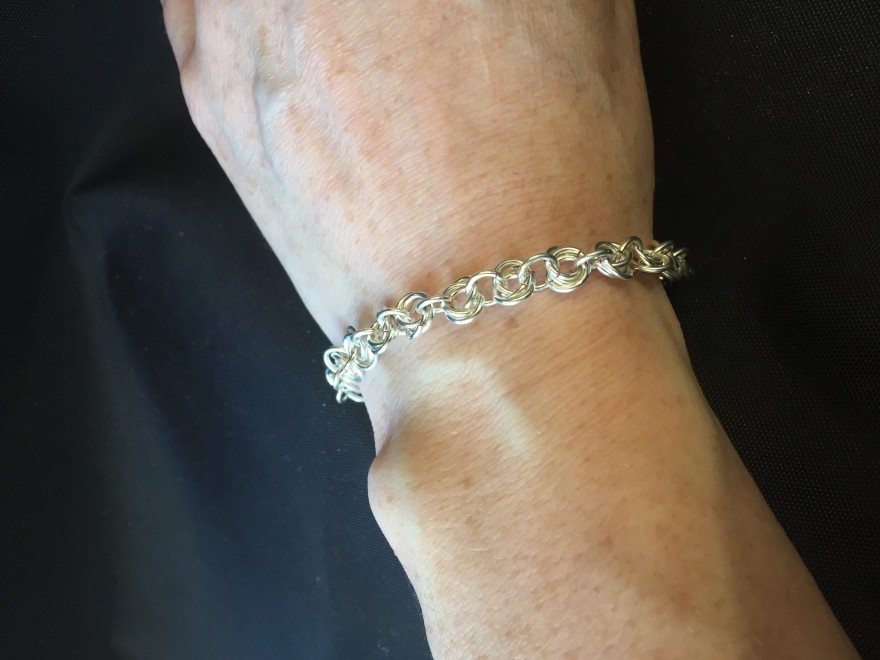
Craft wire bracelet:
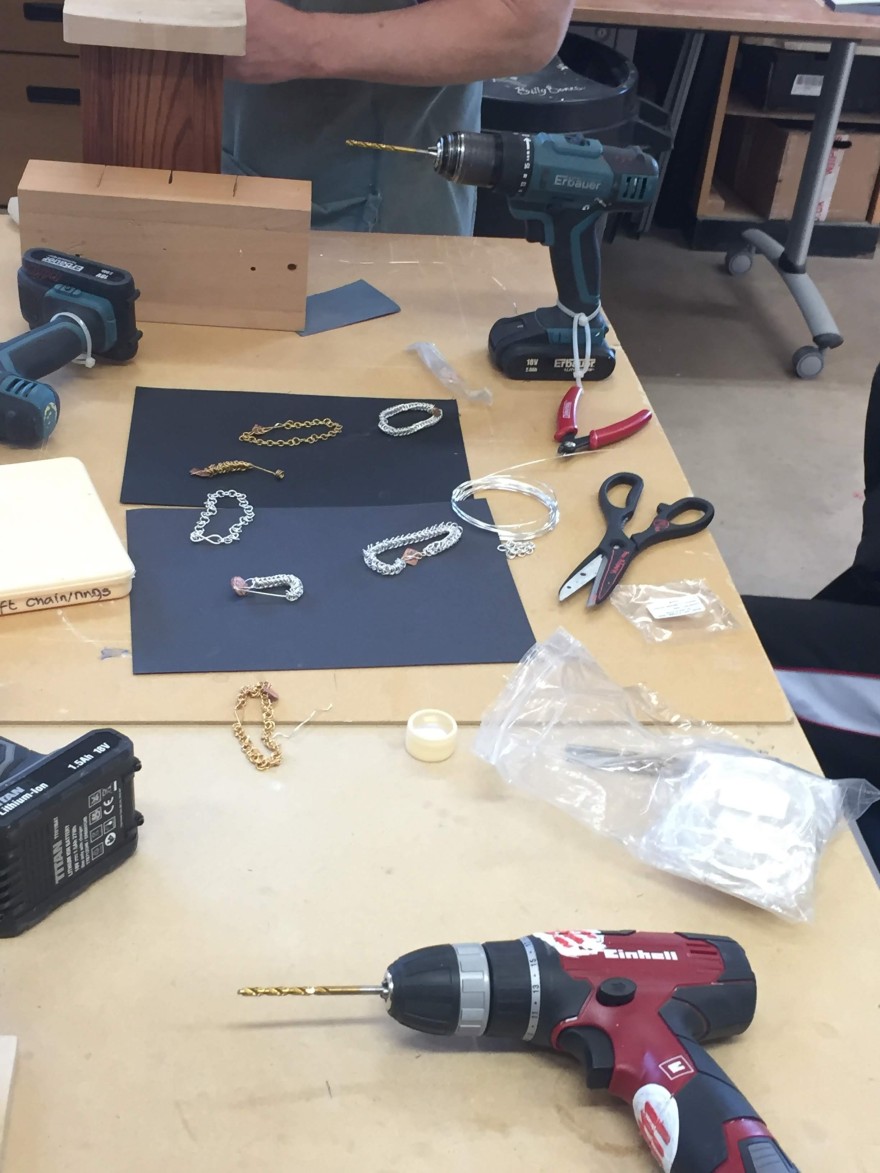
The first workshop I enrolled in was craft wire bracelet. I felt it would ease me back into making but it was also something I’d never done; use craft wire or make a bracelet. Our TD, Matt, put us all at ease. He brought us through all the tools we would use to make the bracelet. He showed us the different types of craft wire and several varieties of bracelet which could be made from the technique we would learn. In the image below you can see the equipment and finished bracelets. These bracelets are made with copper wired coated in silver or gold. The wires range in thickness too, the optimum being 1mm for a delicate 3 loop bracelet.
Table with tools and craft wire ready for workshop
The process is quite straightforward but requires precision and a keen eye for detail. Each step must be completed to the best finish in order to achieve a good final bracelet. The image on the left, below, shows the technique of creating the links in the bracelet. By simultaneously holding the wire and rotating the drill bit, a wire spiral is formed. This spiral can then be placed into the work hole in the wooden block as seen in the right image. This wire spiral is then cut into using a coping saw, a type of bow saw for cutting intricate detail in wood or metal. I lost count of the amount of blades that snap whilst cutting into the wire. Apparently this is normal and part of the process.
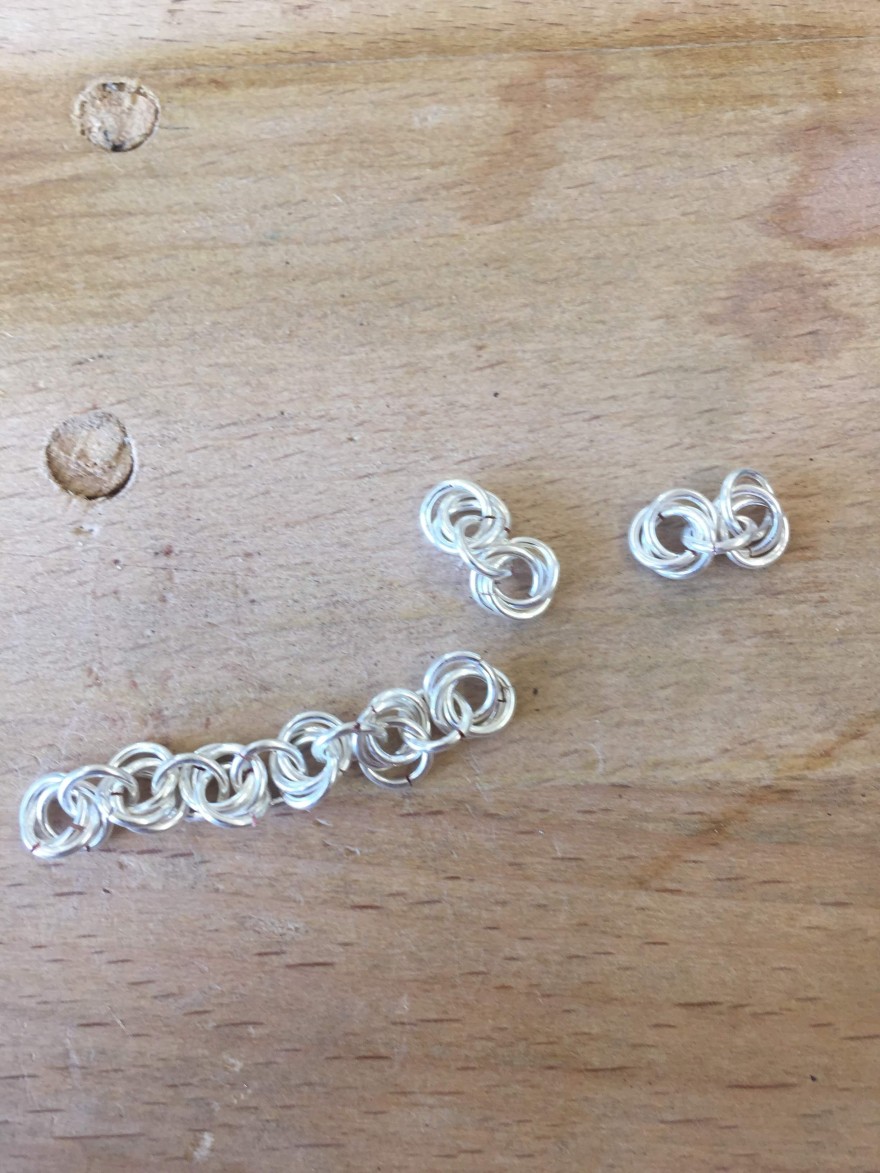
Once the individual links have been cut, they can then be joined together using pliers. In the image below, it shows how three links are joined to form one component of the bracelet. Once these components have been made they are then joined together with one singular link which in turn forms the bracelet. It’s a slow process in truth, to create each individual link and then make the bracelet. It takes time especially in order to cut straight into the wire and not damage the silver coating with the blade from the saw.
3-link components attached using one link
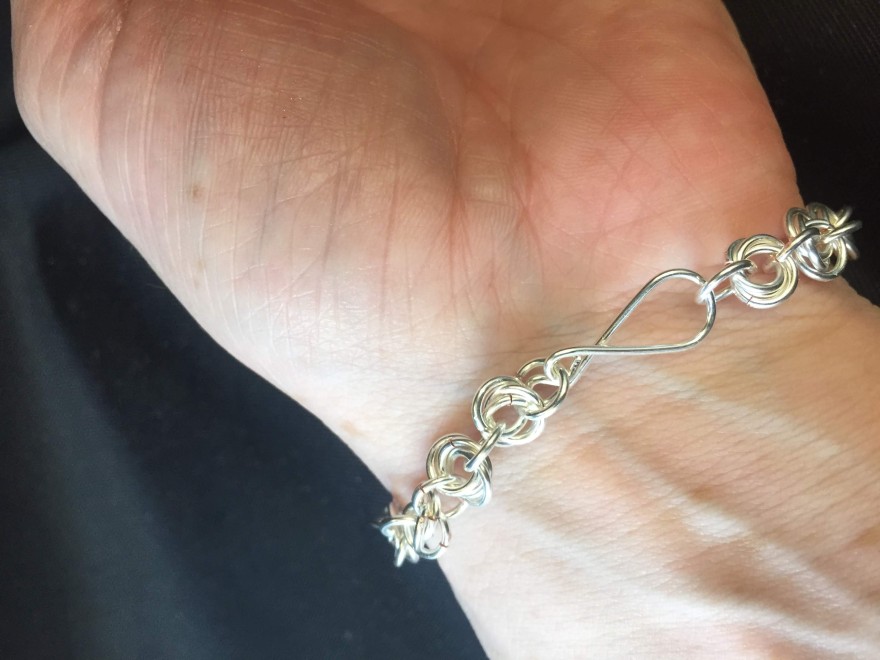
Once I was happy with the final length, Matt showed me how to make the clasp. Deceptively simple yet impossible to describe so I’ll not even try. After our three hour workshop, my bracelet was complete and my appreciation for jewellery making had increased tenfold. The skill in working to such a small scale and with precious, valuable materials means there is a high level of concentration and craftsmanship as well as artist talent.
Finished braceletDetail of clasp on bracelet
Two-part plaster mould and slip casting:
Two-part mould
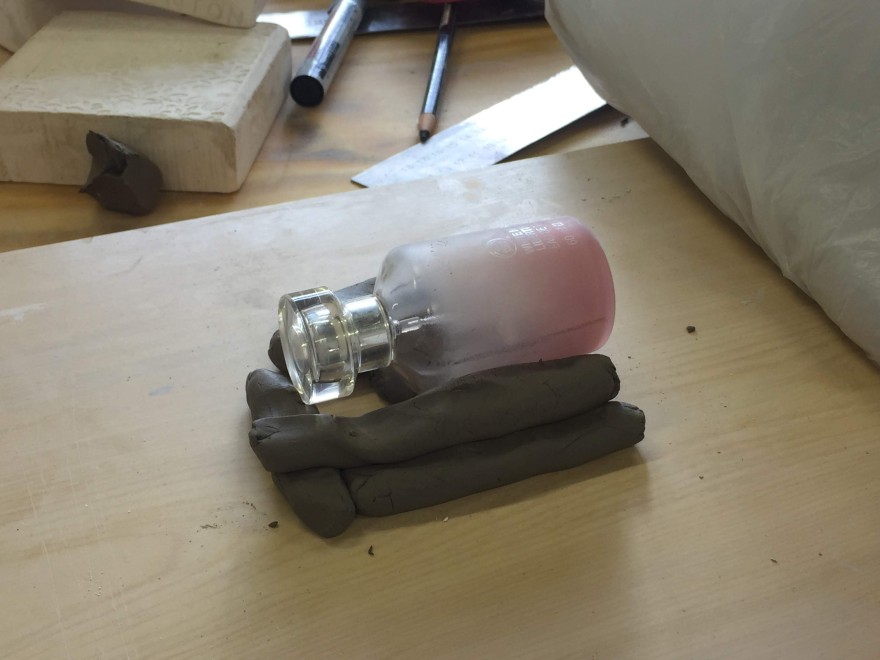
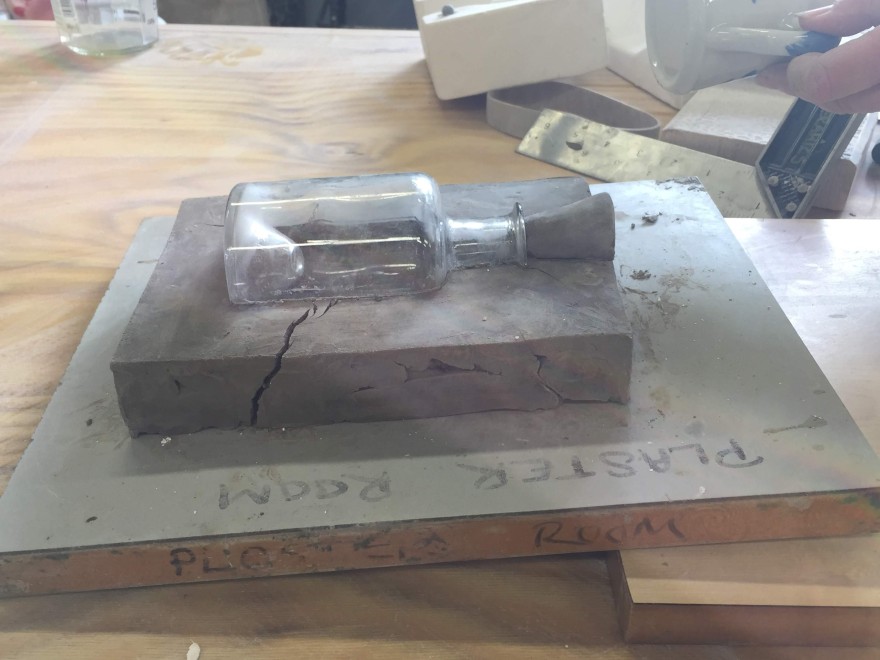
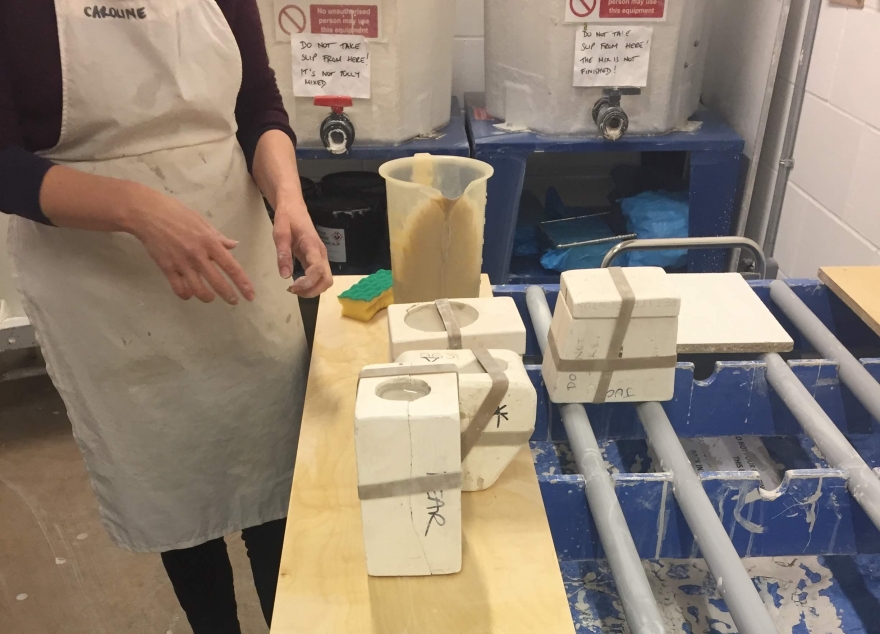
I was very excited and fortunate to have the opportunity to do this workshop as I didn’t choose mould-making as my elective in Crawford. I have knowledge of plaster moulds from our workshops in glass like open face moulds and wax steam-out moulds. It was now my chance to learn about the intricacies of multipart moulds. The added bonus was getting to do slip casting as this is also something I haven’t done in Cork. I chose a plastic water bottle as my object to mould. The TD Caroline used a perfume bottle to show us how to create the clay reservoir around the mould. These two images show the black wax central line along the side of the bottle which highlights the height to which the clay is to go. This is vital as too high or too low and it could cause the object to catch in the mould.
Example of centre line on model and building up clay beneath it
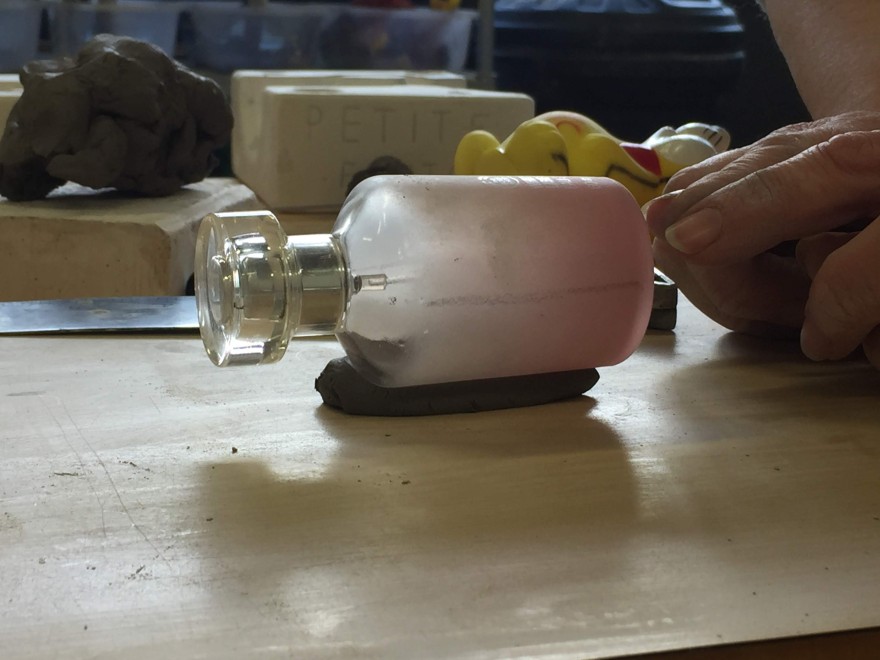
Example of how model and clay show be before cottle boards are put into place
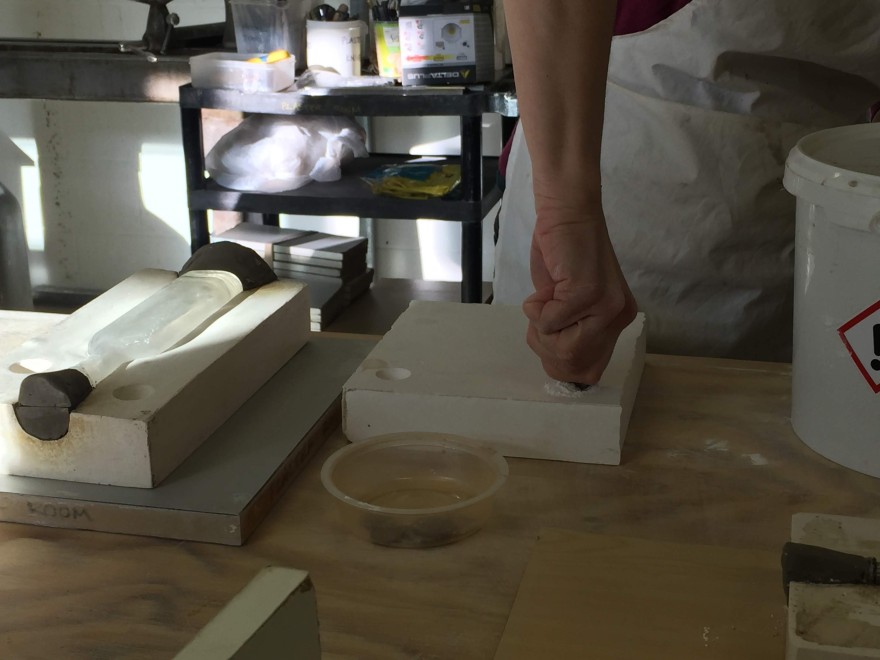
Once the clay around the object has been levelled down which is easier said than done, and the spare has been created for the pouring hole in the mould (above, although obviously this is only for demonstrative purpose as there should not be any cracks in the clay), this can then be surrounded with cottle boards. This process is familiar to me as is mixing plaster but it’s always good to practice these techniques. Once the plaster has gone off between the boards, they can be removed and the plaster/clay block can be slid across the base board and turned over. All the clay must be removed from the object and the first part of the plaster mould. The natches are then impressed into the plaster in order to allow the individual parts of the mould to separate easily. Using a coin, I chose a spot on my mould and slowly twisted and turned the coin until the natch was about approx. 6mm deep. Below image shows TD Caroline showing us how to do this on a sample piece of plaster.
Using coins to put in natches into the plaster
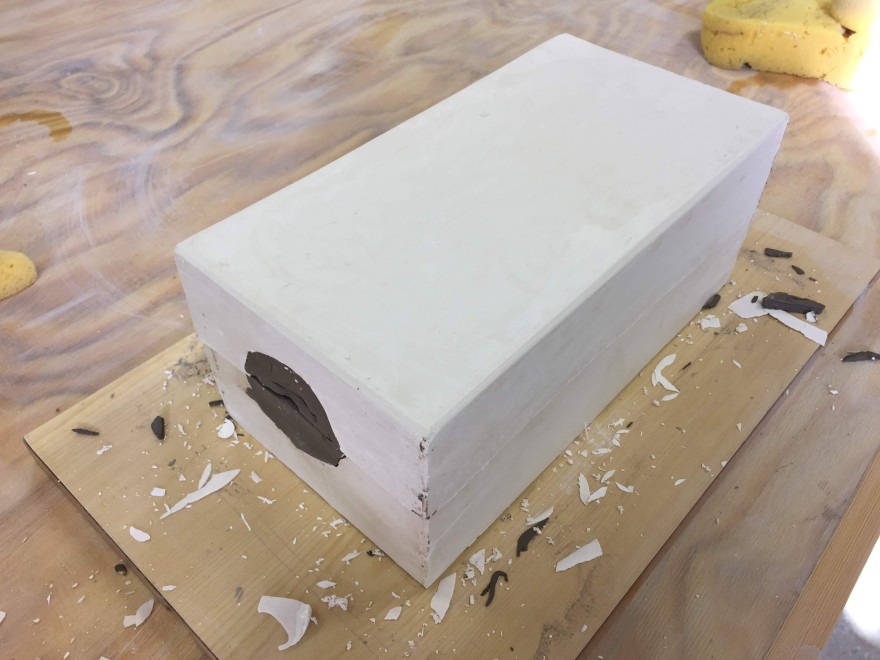
Soft soap is then applied to the plaster so that it becomes less soluble. This technique involves sponging over the plaster with soap resist, then rinsing the sponge in water before wiping the plaster again. This process is repeated another two time (three times in all). Any bubbles from the soft soap must be removed with a dry brush or the next plaster poured could become brittle in these spots. A copy of the spare must be placed over the original to create the hole for pouring slip into the mould. The cottle boards are again placed around the plaster, sealed with modelling clay and plaster prepared and poured. Once gone off (about 25 mins) the boards can be removed. The below image shows the two part mould just after the boards were taken away. It clearly shows the spares in place.
Once cottle boards are removed the spare can be seen
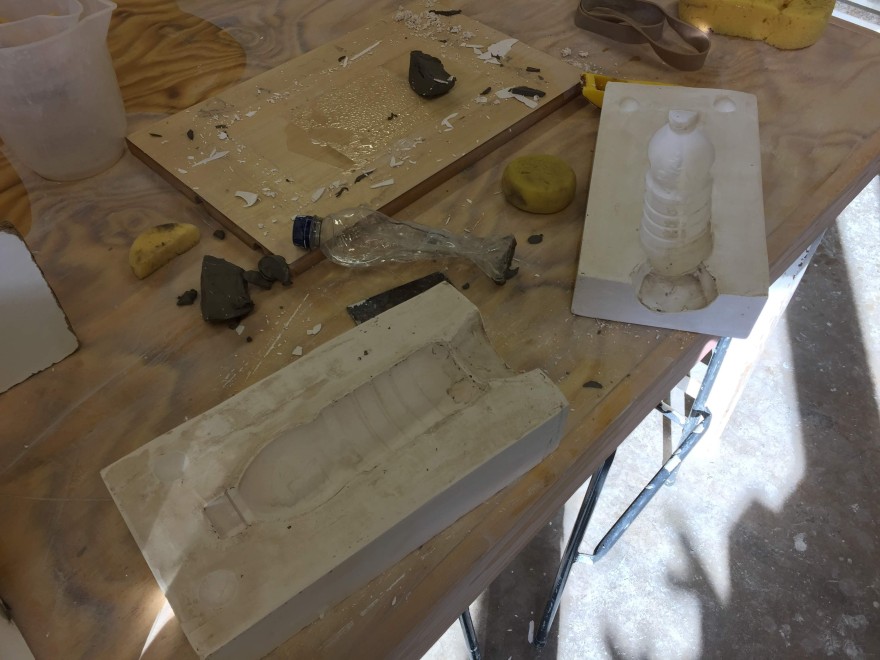
The two parts can now be separated, see image below. I had an issue taking the plastic bottle out of one part of the mould. This was because I built my initial clay block higher than the black central line. This caused the mouth of the bottle to be caught within plaster. Caroline helped me removed it but I did take a tiny chip out of my plaster mould of the bottle. The casting from this would be perfect but I could fettle the clay back at that point so it wouldn’t be noticeable in the finish clay piece.
The two parts of the mould when taken apart and the model removed
Slip casting
The final day of the workshop was slip casting. Considering I had watched the Great Pottery Throw Down the night before which included epic fails of casting, I was expecting something similar from me. However, I was pleasantly surprised and glad that I did not get slip all over my jeans or runners. Caroline demonstrated the process to us in older plaster moulds, below, before we were finally able to cast from our moulds.
Caroline demonstrating pouring casting slip into moulds
The slip we used was earthenware which is fired at 1,220C. Deflocculant, in this case a mix of sodium silicate and sodium ash, is added to the clay body and water so that less water is used in the slip. The slip must be throughly mixed before use. Our moulds had to be clean of any clay or other particles as this would be caught in the casting. Before pouring, we had to make sure the parts of our moulds were securely kept together using the rubber bands. Now we were ready to pour.
Fill the mould with slip up to the top level of the spare.
Allow to settle for 20mins (depending on type of slip and room conditions).
Angle the mould when pouring out slip as to avoid a vacuum in the mould.
Turn upside down onto a dripping tray to dry for 1 hr
Excess slip must be poured back into mixing bath through sieve.
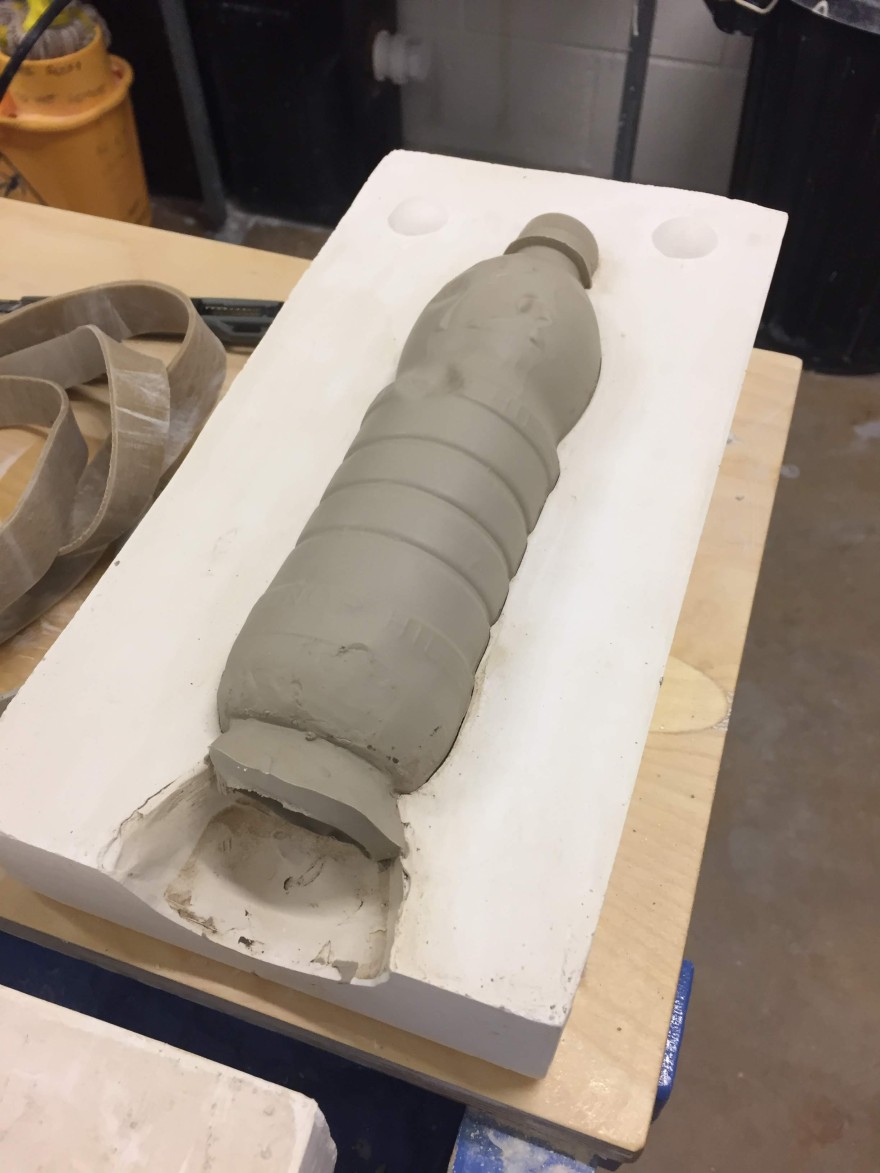
Below is my casting with one part of the mould removed. The clay was still quiet malleable at this stage so I let in place for another 2 hours to dry out before removing it from mould.
My slip cast bottle still at a soft stage and when mould
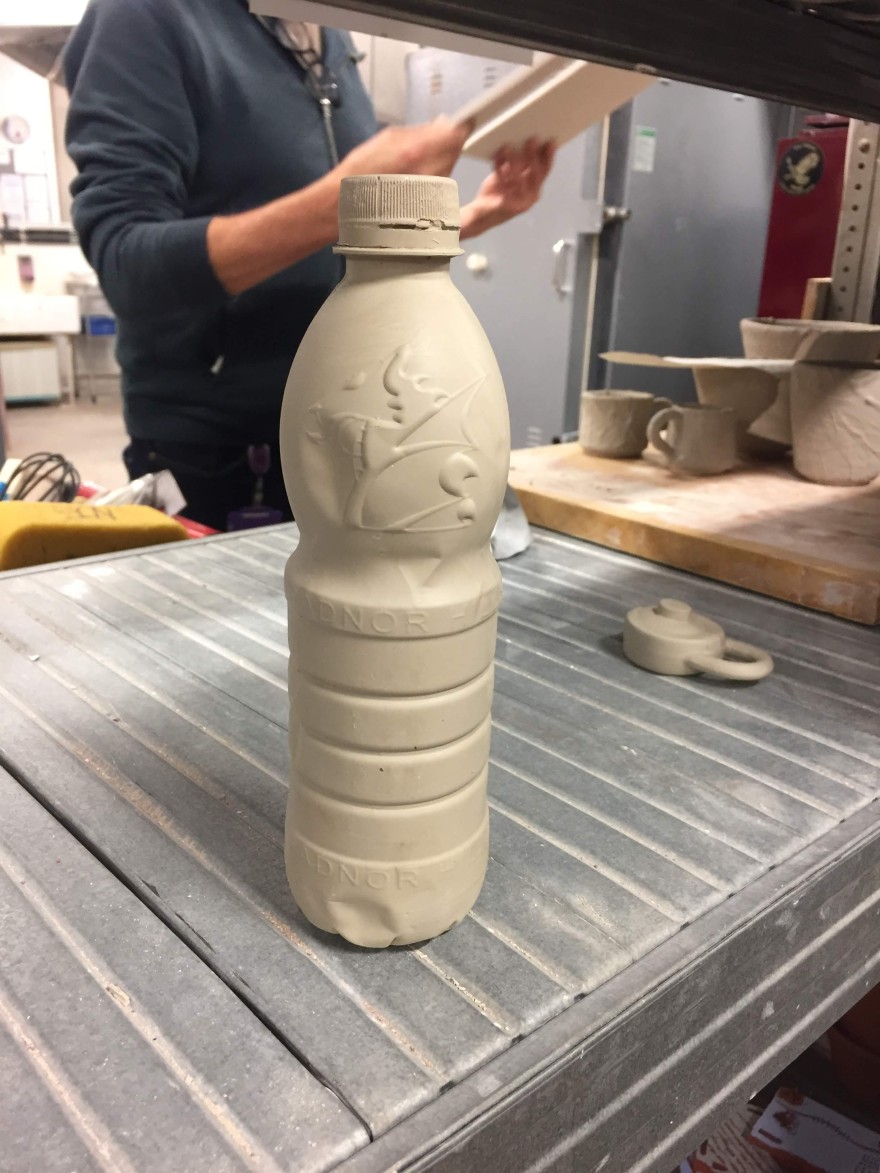
I returned to the ceramics workshop and then worked on the ‘bottle’ to remove seam lines from the clay. I was also able to remove the small bit of extra clay that was at the bottle’s mouth as a result of the chip I made in the plaster mould. The image below shows it waiting for firing. It shows how the casting picked up the dents that were in the bottle from handling as well as the makers impressions on the bottle. Amazing detail.
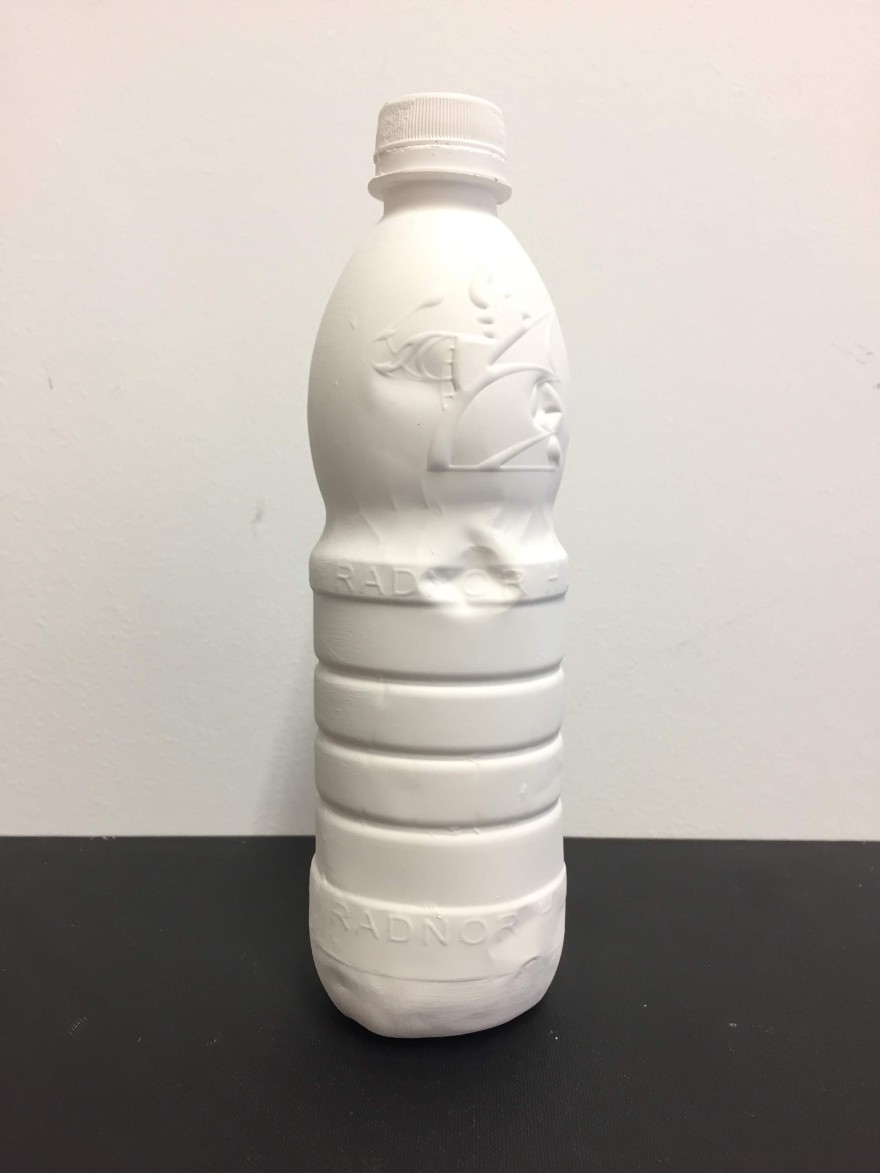
Bottle on drying shelf before firingBisque fired bottle
Bisque fired bottle
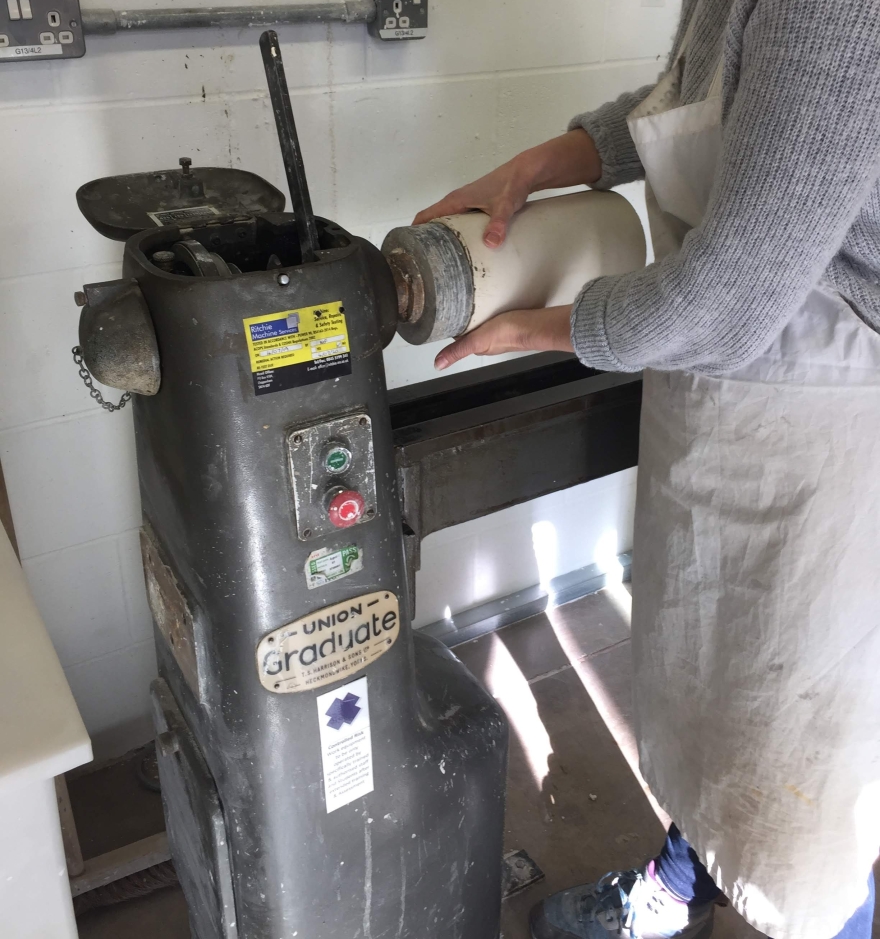
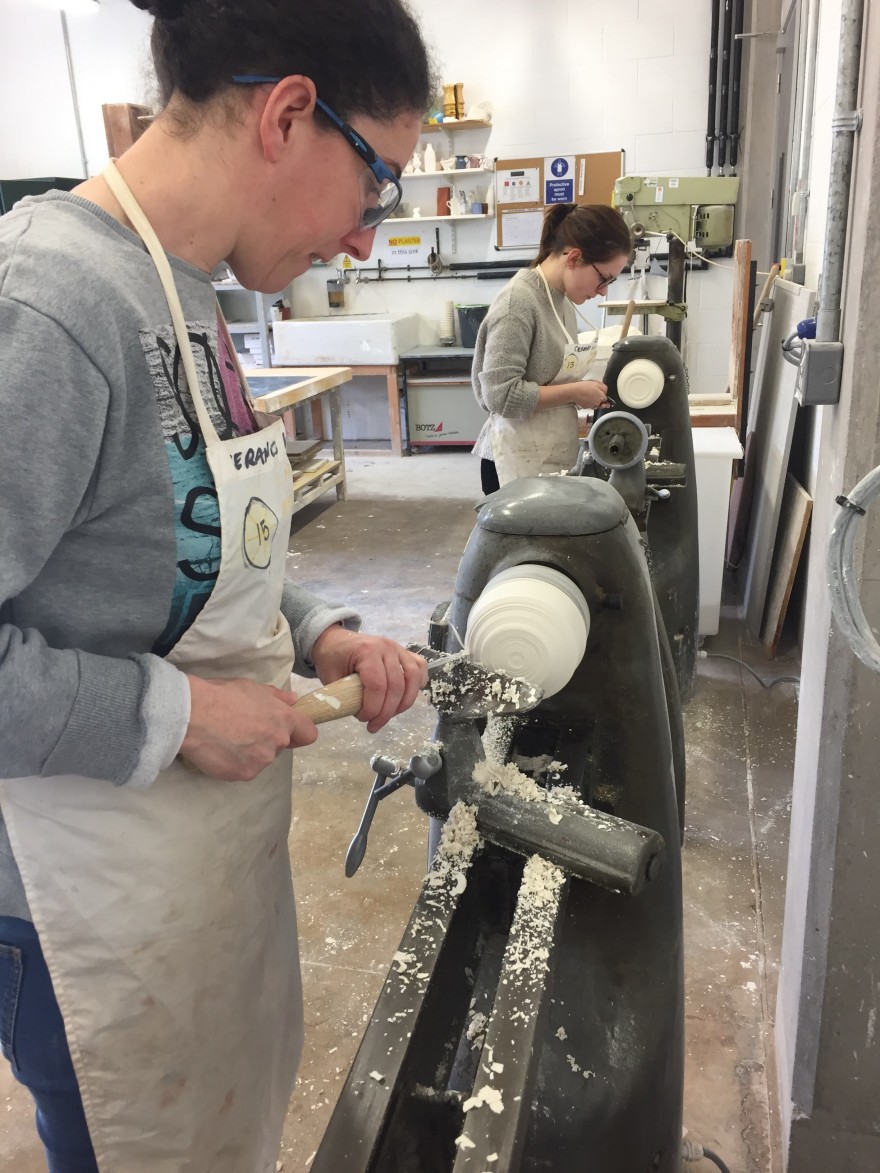
Plaster Lathe
The plaster lathe is another piece of equipment that we don’t have in Crawford. So again I feel very lucky to have the chance to work on it here. Caroline was also doing this workshop with 4 of us over two days.
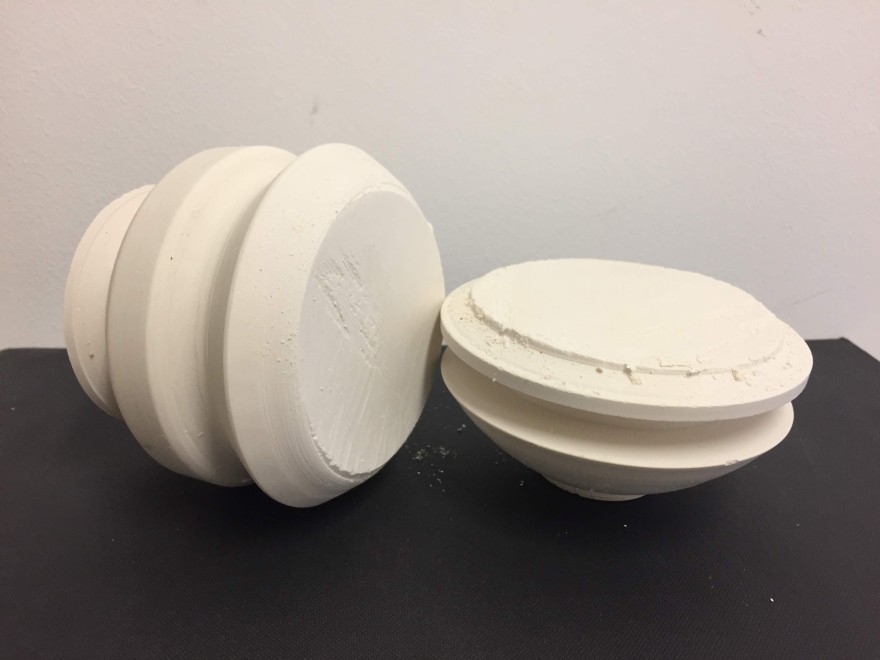
Selection of plaster models turned on the lathe and examples of fire/glazed ceramics created using plaster lathe models.
Day one involved pouring plaster into the metal chuck in order to have plaster to turn on the lathe. This process was very similar to preparing a model for casting. The circular metal chuck had to have modelling clay built underneath it and flush to its edges before wrapping it in plastic. This created a reservoir for the plaster. See images below.
Centring the metal chucks on boards before surrounding with modelling clayClay modelling clay underneath the chuck and smoothed at the edges to become flush with the chuckWrapping plastic around the chuck to create reservoir for plasterSecuring the plastic with a clothes peg/clamp before tying with stringSlip knot and then double knotted string around two points of the plaster
Inside the plastic a narrow strip of modelling clay needs to be pressed to prevent leakage of plaster down between plastic and chuck
Before pouring, the plastic needs to be secured at the base with clay to prevent leakage
Once poured, the plaster is left for a minimum of a day. It can be worked on as soon as set however it is very soft so it’s best to wrap in plastic and give more time for it to dry slightly. It is important not to allow the plaster to dry out complete or dust will be an unnecessary hazard.
Day two: There are lots of health and safety precautions that need to be taken when working with the lathe. No dangling materials like scarves, hair, jewellery, loose sleeves etc. The machine must be turned off when not working on the lathe and when adjusting the tool rest.
Caroline demonstrating how to attach the chuck onto the machine while the spanner stops the internal rotating wheel from movingUsing the tool rest to protect and support hands when working at the latheExample of plaster removed from one side of plaster as it’s being centredWorking on the lathe
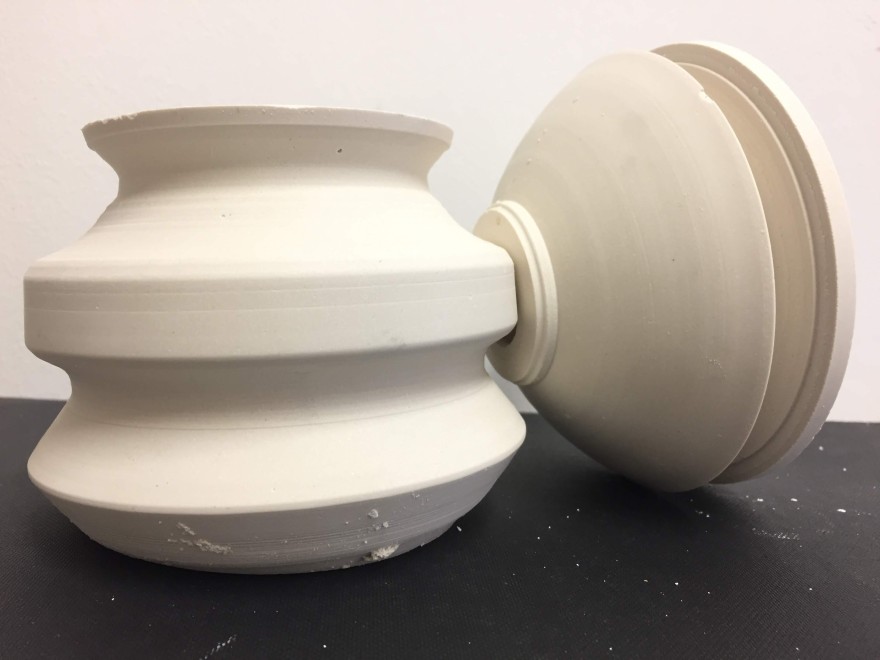
Two pieces that Jane and I turned on the lathe from our single piece of plaster
I really enjoyed this workshop. It’s a completely different way of working. Like everything, practice makes perfect. Individual pieces can be turned and then joined to form larger structures. Models can also be cut, manipulated or textured after being turned on the lathe.
Digital Stitch Workshop
My sinuses and head are aching but I really wanted to get to this workshop. So, fully dosed up with decongestant and painkillers, I got to the workshop. The reason I wanted to do it so badly, besides getting to learn about a new piece of technology or technique, was because we recently acquired a digital stitch sewing machine at Crawford and this workshop will help me understand the software and how to use the machine.
Over 3 weeks, our technician Maggie will bring us through the software, the machine itself and how we can create our own designs on the the machine. Today we focused on getting to grips with the software and how to use the program. Some elements reminded me of Photoshop but other parts are very much thread relevant.
Image showing the how the interface looks.
Here are some samples which Maggie has created to show the possible of the digital stitch machine. It is clear to see from some examples how the angle of the stitch, whether its 15 degree angle or say 90 degrees, can effect the overall look of a piece of work.
Samples showing the results of the digital stitch machine.
By the end of the 2 hour workshop we had used the weave fill, satin fill, motif, embossing, turning angle, feathering and line stitch tool within the program. Maggie has thankfully uploaded all the instructions onto Moodle for students. Below is an image of the screen when all these stitch tools have been used. It got me thinking how I could these techniques to create a piece for the Make Your Mark module as part of subject. I hope that next week I’ll have a design to work with which is relevant to my research into memory.
My screen showing all the different stitch tools we used in class
Day 2:
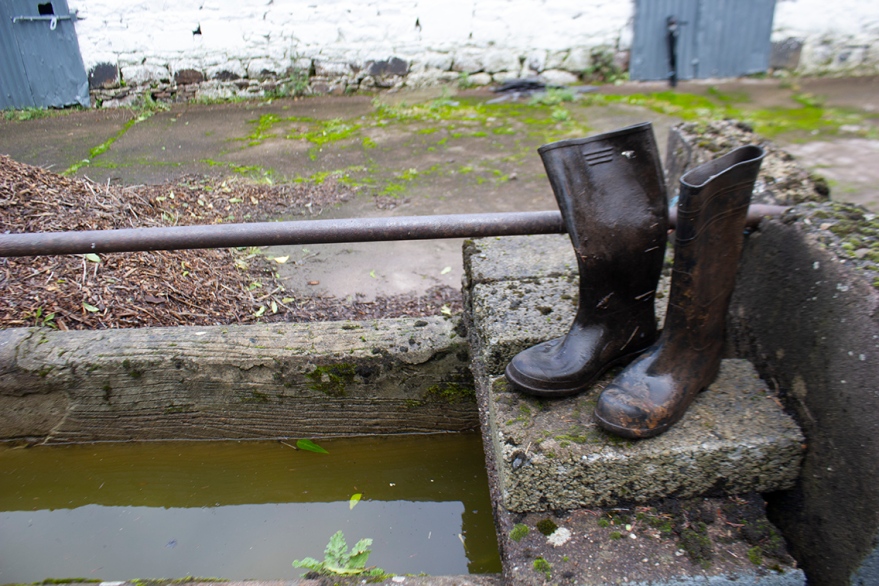
Today we had to bring our designs in to work on. I used an image I took during my initial visual research last year based on memory and the memory of my grandfather. I took photos around the tank, used a pair of wellingtons and placed them in different positions around and in the tank of water. One image I choose is of the wellies sitting above the water on a lintel which crosses the tank.
An image I took for my visual research on memory
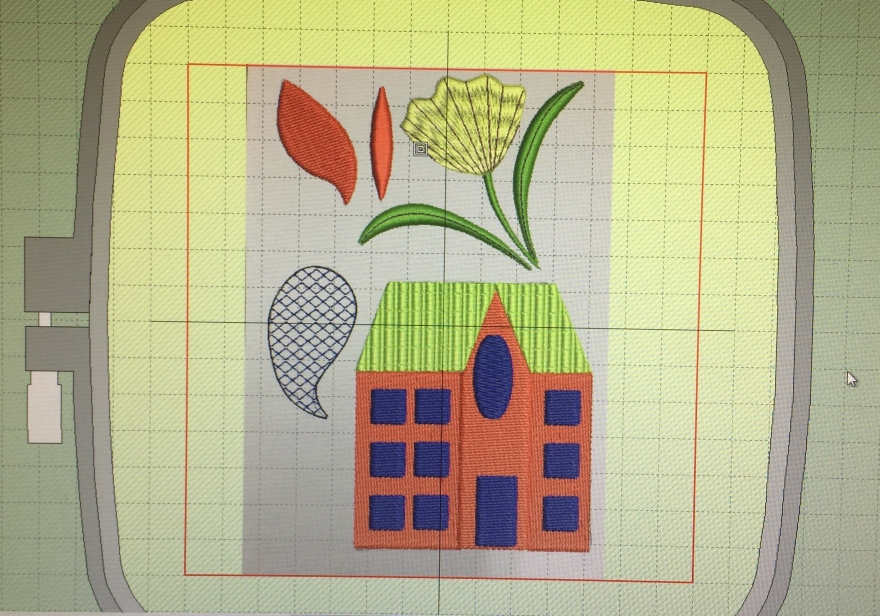
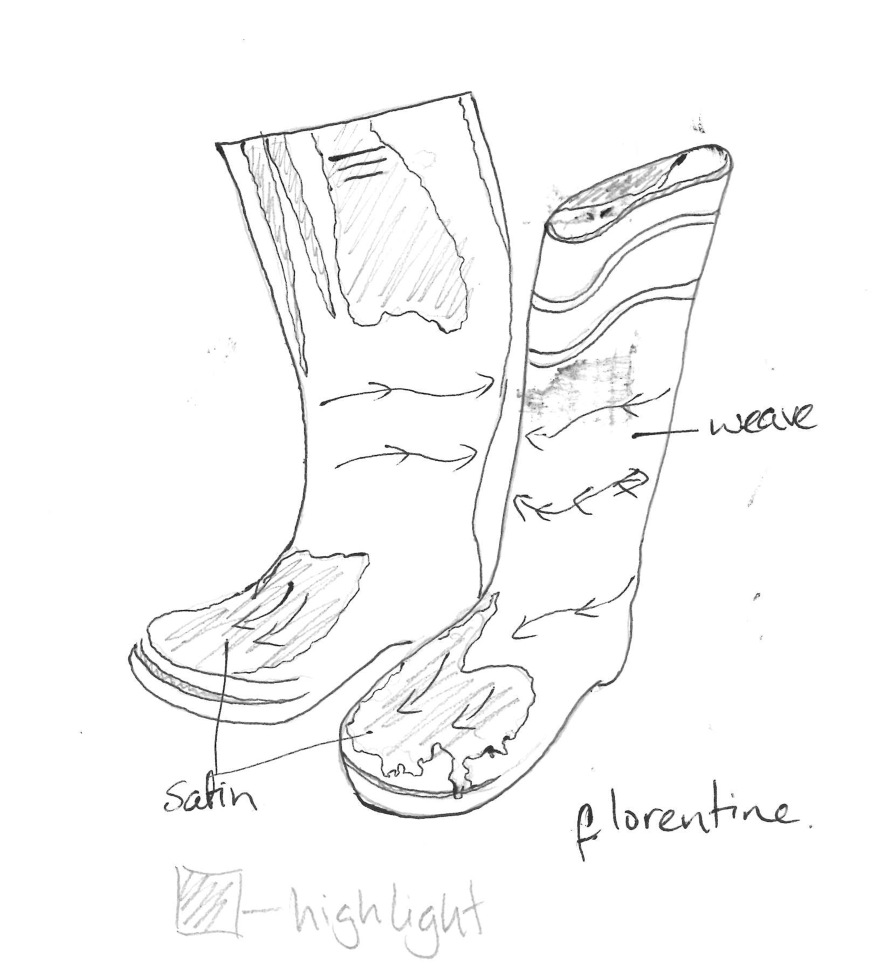
My stitch plan then had to bring my wellies back to basic form and include stitch direction. This image must be saved as a jpeg in order to be open in the Easy Stitch software.
Stitch plan in jpeg formatMy stitch plan on screen, shown within the structure of the hoops
I used weave fill and Florentine effect on my design. This helps to create a 3D effect using curves. By playing with the stitch width I could also give a light and shade effect.
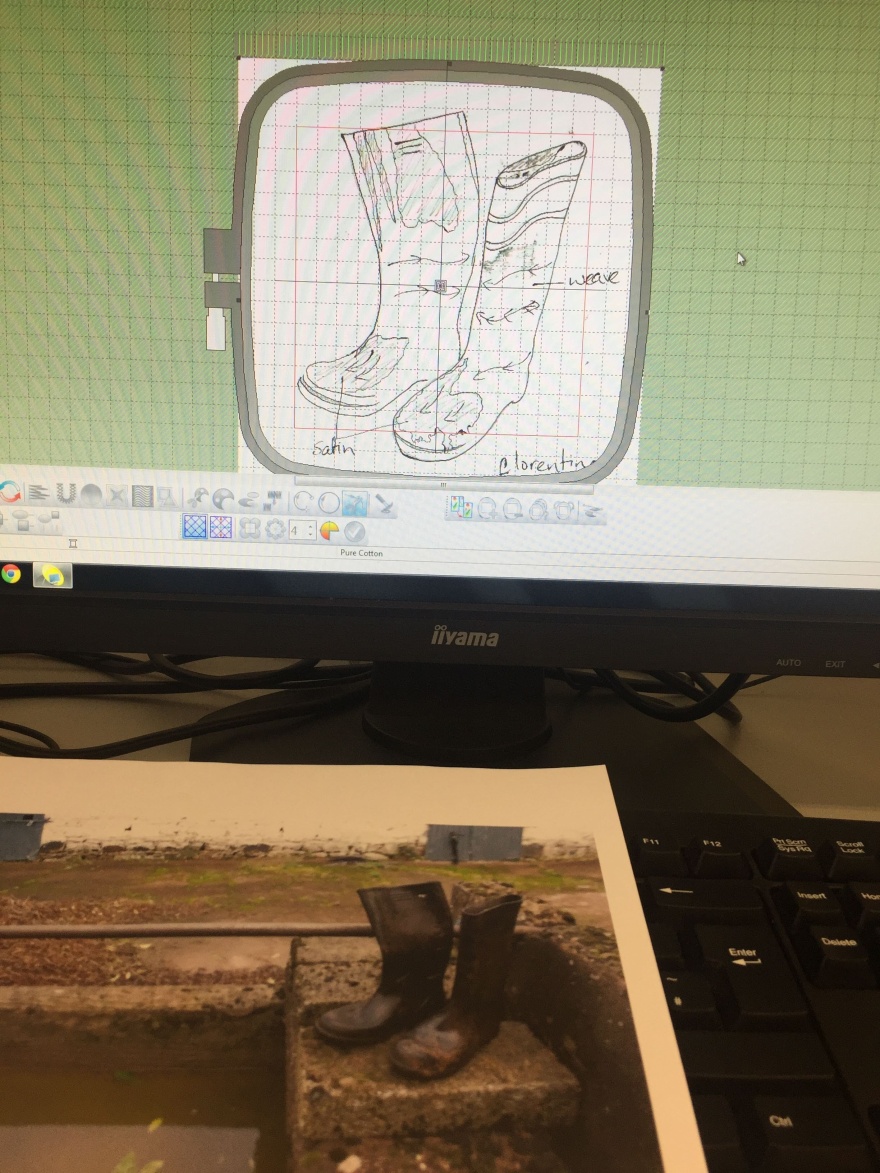
Screenshot of my design
The image above shows my design just before end of class today. I really like the look on the screen, I hope it turns out the same on fabric. I’m also thinking of using this technique as part of my studio practice too. As time is now a factor in my work, textiles would give me more flexibility than, say, ceramics. Anyway, next week I can send it to the digital stitch machine and see how it turns out. I can change settings if I’m not happy with the effect. So until next week….
Augmented Reality 11/03/20
I’m still trying to get my head around this workshop! It blew my mind. I wanted to learn about AR because digital technology like this will be part of a skillset I need for the future. Maybe by incorporating it into my work, or as a way of promoting my work as its something to accessible to anyone with a mobile phone.
Our tutor Matt, went through all the steps and gave use the files and links need to create the work. It was more a beginners guide class of putting the parts together, not how to make the parts. Although much of this information is available for free online.
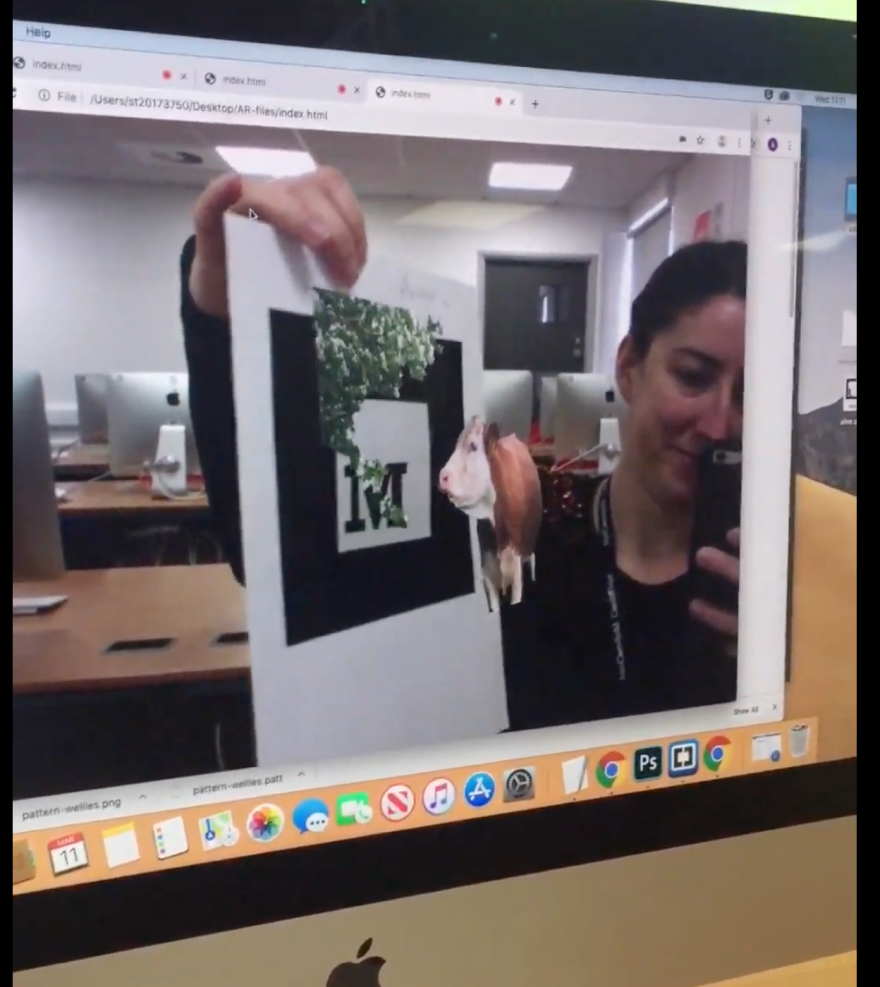
Still image taken from my video showing the cow and tree.
I tried to create a double layered image from a photo I had of one of our cows eating the blossoms from a tree. By using photoshop and creating two layers, one of the cow and the other of the tree, these then combine with a trigger is placed in front of a camera. The trigger in this case is the letter M surrounded by the thick black outline. Matt showed us how to amend the code in order to then change the image as it would appear when triggered. Images can rotation and shift either on the x, y, or z axis.
I hope to make more time to play with what I learned today. Deadlines are approaching and things take priority but I want to use what I learn on the course while I’m here. I did ask Matt how could this be implemented at an exhibition. By creating a QR code, which a person can scan using their phone or iPad, this brings up a website address which has my images embedded. To trigger them, the person then scans the trigger marker, which then plays my AR on their device. Something to think about for future exhibitions or to print on catalogues, business cards or books.
Did a whole art genre pass me by? It certainly felt like that after our first lecture with Sean on artists’ books. Now, at the end of the project I feel I have caught up somewhat on the history of book art. This is due to several factors; Sean’s lectures, access to the Special Collection by Doreen Barnville, viewing the Ron King collection and referencing library books such as Joanna Drucker’s The Century of Artists’ Books. I understand a book can be whatever the artist wants it to be. Free reign with certain limitations.
So, what did I want mine to be about? I struggled to answer that question at the beginning and this whole project made me reconsider my research and even my interest in my chosen topic: memory. It brought me back to the original question I had set myself last year; how do I make an abstract concept such as memory into something physical and tangible? This in turn led me back to the catalyst behind my initial research which was the memory of the day my grandfather died. I hear my grandmother asked ‘where will we bury him?’ like a recording in my head. This and much of that day is seared into my mind. It was writing the word ‘seared’ into my sketchbook that was the moment I knew I could use the laser cutter to do something similar on paper.
At the start, I also felt like I wasn’t ‘doing’ or ‘making’ enough. However, I know the time I spent researching other artists’ books helped me to formulate ideas about my own book, such as elements I wanted and didn’t want. Also, by organising my time I was able to test ideas and finishes which helped in the end to produce books I am happy with. I think the technical classes went well as I learned new techniques that I can add to my bank of ‘making’ knowledge. The learner journal was a challenge as I log my thoughts and ideas in my sketchbook normally, but I’ve found the process helpful and organises my thoughts better.
I think much of the information and knowledge I gained over the past few weeks has seeped into the mind like osmosis rather than one instant download. As I was making I was thinking and any decisions came about in a very organic manner which confirms to me my trust in my instincts.
If I had more time I would test other means of producing the wording on the pages either through screen-print or maybe etching. I might also explore a different aspect of that day, one that lends itself towards the use of images.
This project has helped me to think in 3D again. All my concentration had been centred on producing photographs and film in the last semester that I had left the making behind. It revived the conversation between my hands and my mind, a conversation vital to any maker.
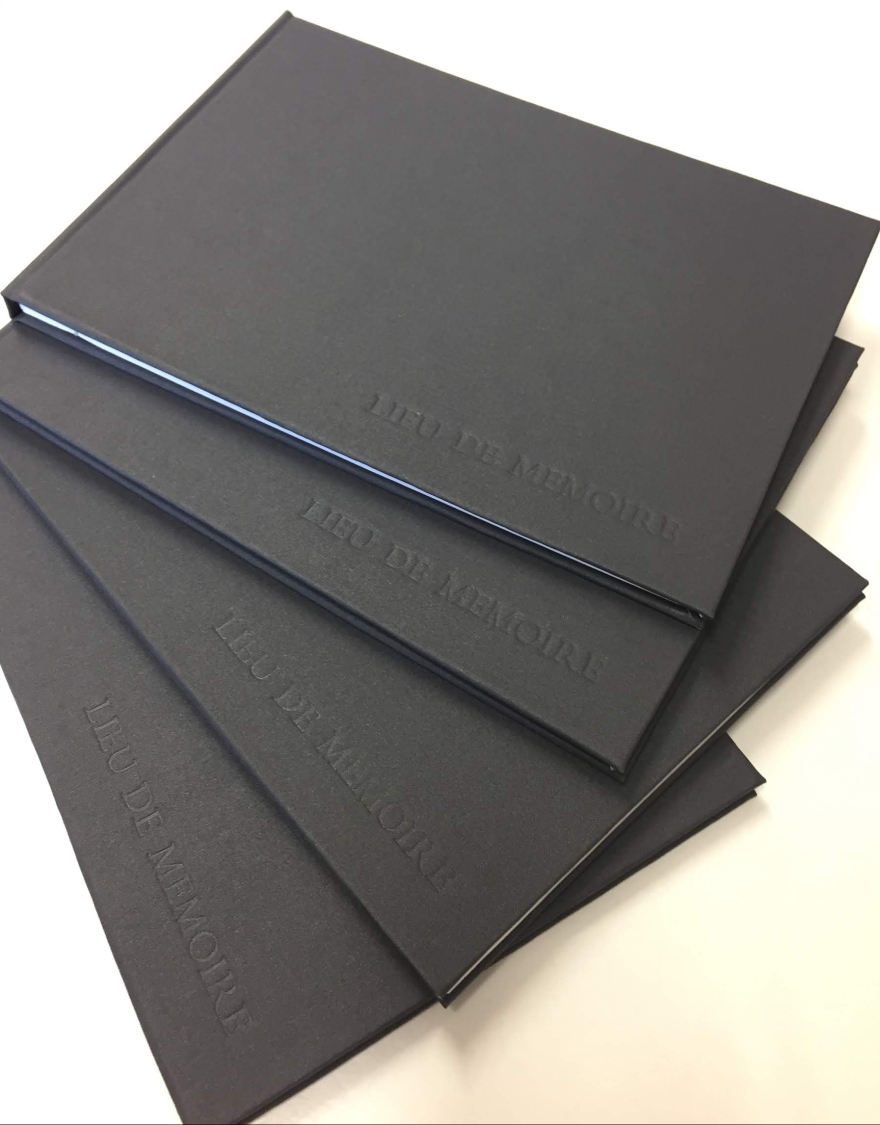
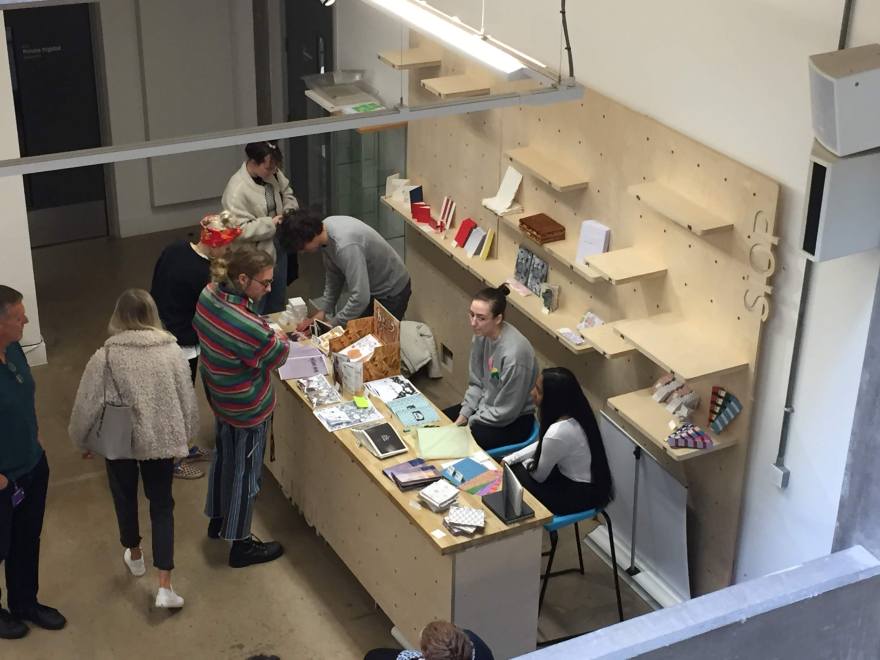
Today is the last day of the project. Six handmade editions finished, all Japanese stab stitched and case bound. It’s also the day that our work will be available for viewing and sale in a book fair at the college’s heart space. An odd feeling having others go through the books. I became precious about them, which is natural when working on something so personal and involved. What price do you put on something that you spend so much time working on and thinking about? £10 as it turns out. An arbitrary sum as these books were never made to make a profit. And as Sean says you’ll almost always lose money when making books.
Editions of my book, Lieu De Memoire, ready for the book fair
Level 5 Book Fair in the Heart Space at CSAD
I still have my presentation to do today and also to submit my reflection post here. Certainly the learner journal has made me think more about my thought process and how I produce work from idea to finished piece. It all feels very intuitive and organic to me. The past five weeks have been testing, not because of the project, I’ve throughly enjoyed that. It’s because I’ve been away from home, missing family and friends, missing the rural landscape of home and adjusting to life here in Cardiff. Next week brings another project which will focus on our personal research I believe, which I’m really looking forward to.